How to Photograph Alcoholic Beverages for a Luxurious Look
Photographing alcoholic beverages isn’t just about snapping a quick picture; it’s an art form that can transform a simple drink into a luxurious experience. Whether you’re a business owner looking to enhance your marketing materials, a blogger wanting to add some flair to your posts, or just an enthusiast looking to showcase your home bar, mastering the art of photographing drinks can set your images apart. Here are some easy-to-follow tips on how to give your alcoholic beverage photos a touch of luxury.
1. Lighting is Key
Lighting can make or break your photo. Natural light is always a top choice because it can beautifully highlight the liquid’s clarity, color, and sparkle without making it look artificial. Try to shoot your drinks near a window with plenty of indirect natural light. If natural lighting isn’t an option, consider using a softbox or LED ring lights to imitate the natural light effect. Avoid harsh overhead lights that can create unflattering shadows and reflections.
2. Background Matters
The background of your photo should complement the drink without overwhelming it. Simple, elegant backgrounds often work best for a luxurious look. Think of marble, dark wood, or a plain, uncluttered tabletop. Using a neutral background helps the vibrant colors of the beverage stand out. If you want to add texture, consider placing fabrics like velvet or silk slightly out of focus in the background.
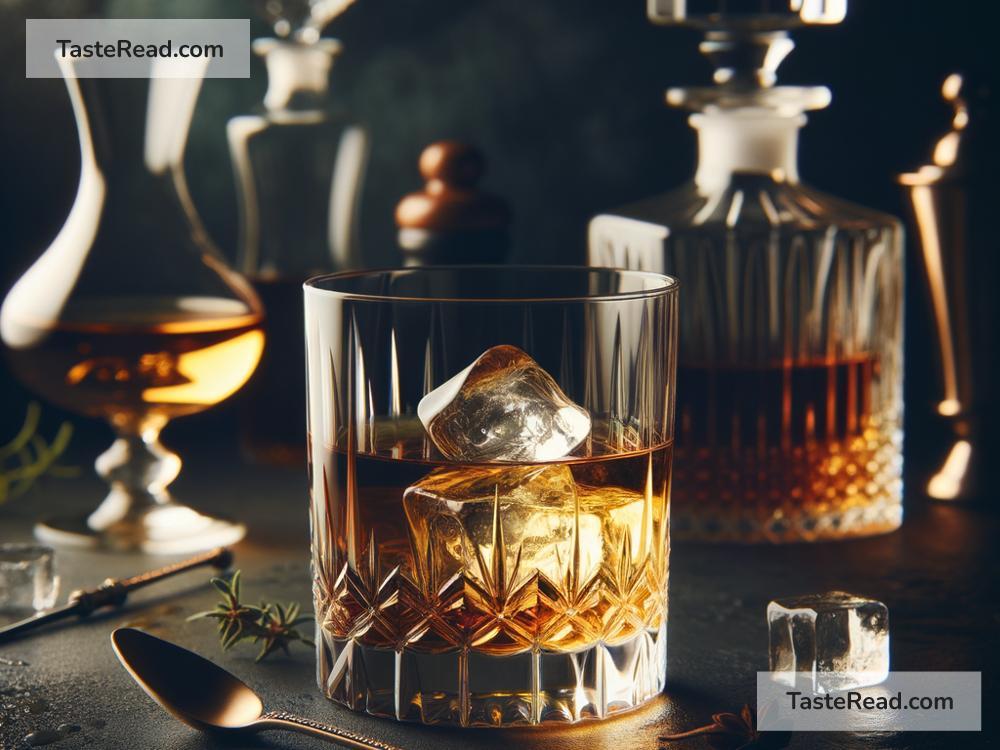
3. Glassware is Everything
The right glass can elevate your beverage’s appearance. Clean, clear, high-quality glassware without any scratches or marks is essential for a luxurious photo. Before you start shooting, polish your glasses to remove fingerprints and water stains. Choose a glass shape that complements the drink and enhances its color and attributes. Sometimes, a unique glass shape can add an extra element of intrigue and sophistication to your photo.
4. Composition and Angles
Composition refers to how different elements are arranged in your photo. Play around with the placement of the glass, accessories, and background elements to find a balance that’s pleasing to the eye. Using the rule of thirds, where you divide the frame into nine equal segments, can help you position your subject in a way that’s more dynamic and interesting. Don’t be afraid to take photos from various angles—top-down, side view, or a 45-degree angle can all offer unique perspectives on the same drink.
5. Add Some Props
Props can add context and depth to your drink photos. However, the key here is subtlety. You want the alcohol to be the star, so choose props that hint at the drink’s ingredients or origins without overcrowding the scene. A slice of lime next to a margarita or some coffee beans around an espresso martini can suggest flavor notes. Quality, perhaps a luxurious napkin or a sleek cocktail shaker, can also hint at the upscale experience you’re portraying.
6. Play with the Liquid’s Movement
Capturing the liquid in motion, like a splash or a drop falling into the glass, can add a dynamic and exciting element to your photo. This technique requires a bit of practice and possibly an extra set of hands, but it can really make your image stand out. If your camera has one, use a fast shutter speed to freeze the motion. This trick is great for showcasing the refreshing quality of the beverage.
7. Post-Production Touch-Up
Even with careful preparation, your photo might need some final adjustments. Use photo editing software to enhance the colors, adjust the brightness and contrast, and crop the photo for the best composition. Be careful not to overdo it – your aim is to enhance the natural beauty of the drink, not to transform it into something it’s not.
By following these tips, you’ll be well on your way to capturing alcoholic beverages in a way that elevates them from mere drinks to luxurious experiences. Remember, practice makes perfect. Don’t be discouraged if your first few attempts don’t come out as expected. Keep experimenting with different settings, angles, and compositions, and soon you’ll be creating stunning, luxurious-looking beverage photos that are sure to impress. Cheers to that!