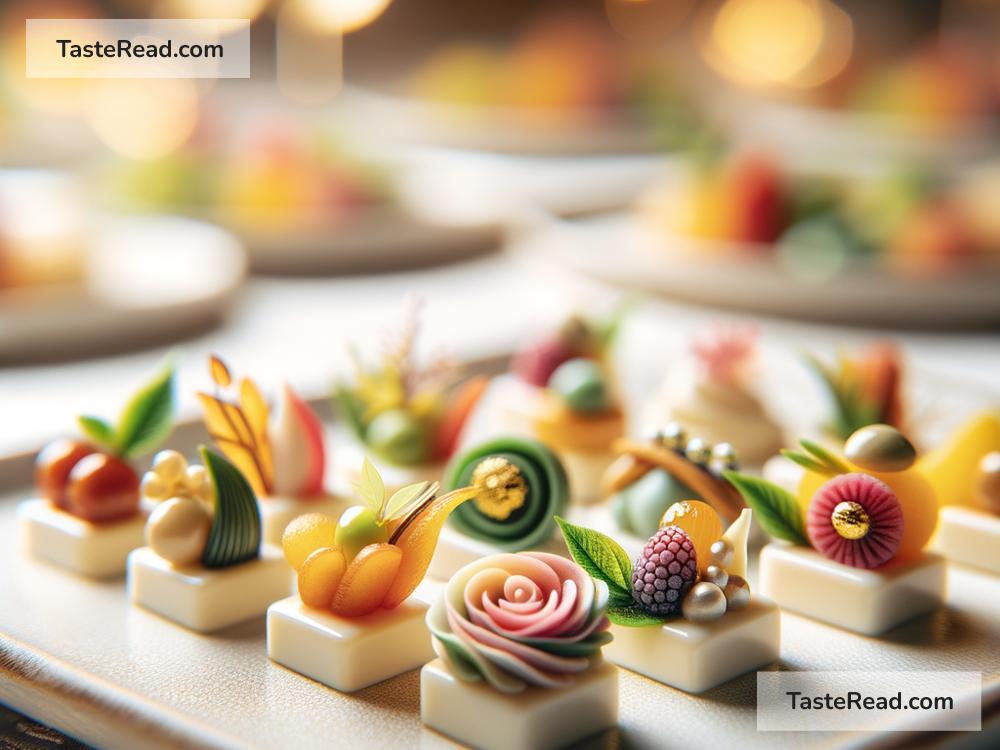
How to Photograph Elegant Appetizers for High-End Menus
When it comes to creating a captivating high-end menu, one surefire way to attract attention is through stunning photographs of your appetizers. These elegant starters are often the first impression customers have of your culinary prowess, and as they say, a picture is worth a thousand bites! Photographing appetizers for high-end menus doesn’t require you to be a professional photographer—you just need to know a few tricks to make your dishes look as delectable as they taste. Here’s how you can achieve that.
1. Understanding Light
Lighting is the soul of photography. For appetizers, you want to make sure they’re basking in the most flattering light possible. Natural light works wonders—it’s soft and can make your dish look inviting. Try to photograph near a window with plenty of natural light streaming in. Avoid direct sunlight, as it can create harsh shadows and highlights. If natural light isn’t an option, consider investing in a softbox or LED panels that can mimic it.
2. Composition Matters
The way you arrange your appetizer on the plate and frame it within your camera’s viewfinder can make a big difference. Use the rule of thirds—a principle that divides your frame into nine equal segments—to position your dish in a way that’s visually appealing. Think about the angles too. Sometimes, shooting from above can capture the elegance of your appetizer, especially if it has multiple components. Other times, a side angle might better showcase its height and layers.
3. Pay Attention to the Background
The background is just as important as the appetizer itself. A cluttered or overly vibrant background can distract from your elegant dish. Opt for neutral tones and simple textures. Think marble, wood, or a plain colored fabric. These backgrounds complement the food without stealing the show. Remember, the focus should always be on the appetizer.
4. Tweak Your Settings
Don’t be afraid to play around with your camera’s settings. If you’re using a DSLR or a mirrorless camera, adjusting the aperture (f-stop) can help you achieve that sought-after blurred background effect, making your appetizer pop. A general guideline would be to set your aperture to between f/2.8 and f/5.6 for starters. If you’re using a smartphone, many now offer a “portrait” mode that can simulate this effect.
5. Get the Details Right
High-end appetizers are all about elegance and details. Whether it’s a sprinkle of garnish or a delicate swipe of sauce, these small touches can elevate your photograph. Ensure these details are sharp and clear in your photo. A macro lens or a smartphone camera’s macro mode can help capture these intricate details. Taking the time to ensure each element is perfectly placed and in focus can transform a good photo into a great one.
6. Edit with Care
Even the best photographs can benefit from a bit of post-processing. Simple edits like adjusting the brightness, contrast, and saturation can enhance your appetizer’s appeal. However, it’s crucial to keep the editing minimal. The goal is to enhance the photo’s natural beauty, not to transform it into something it’s not. You want your potential customers to experience the appetizer as it truly is when they order it.
7. Tell a Story
Finally, try to capture more than just the dish. Include elements that tell a story or evoke a feeling. This could be a beautifully designed menu resting beside the plate, a set of elegant cutlery, or a glass of wine that pairs perfectly with the appetizer. These elements add context and invite the viewer to imagine themselves enjoying your creation.
Photographing elegant appetizers for high-end menus is about more than just taking a picture. It’s about capturing the essence of your culinary artistry and enticing your audience with visual delights. With attention to lighting, composition, and details, and a touch of storytelling, you can create appetizer photographs that look as exquisite as they taste. So, grab your camera and start shooting—the next course is in your hands!