Title: Master the Art of Deglazing for Richer Sauces
Do you want to elevate your cooking from good to restaurant-quality with just one simple technique? Let’s dive into the art of deglazing—a game changer for creating richer, more flavorful sauces. This method not only maximizes flavor but also makes cleaning up a breeze. Whether you’re a cooking novice or an experienced chef, mastering deglazing will take your dishes to the next level.
What is Deglazing?
Deglazing sounds fancy, but it’s essentially a simple technique used to make sauces. After sautéing or searing meat, poultry, or vegetables, you’re often left with brown bits stuck to the bottom of the pan. These bits are packed with flavor. Deglazing is the process of adding liquid to the hot pan to help release these bits, incorporating them into a sauce. The result is a rich, complex base for gravies, stews, and sauces.
The Tools and Ingredients
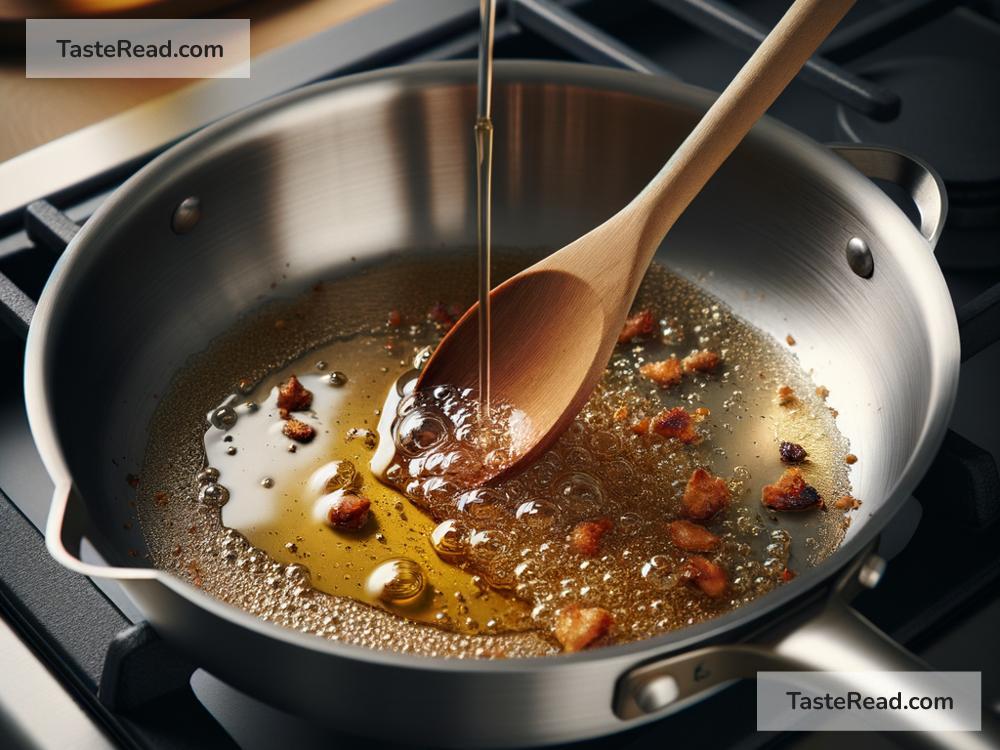
You don’t need special equipment for deglazing—a heavy-bottomed pan and a wooden spoon or spatula are your primary tools. As for the liquid, you can use water, stock (chicken, beef, or vegetable), wine, or even vinegar. The choice of liquid depends on the dish you’re preparing and the flavors you want to enhance.
Step-by-Step Guide to Deglazing
-
Cook Your Base: Begin by cooking your main ingredient (like chicken thighs, steak, or mushrooms) over medium-to-high heat in a pan until it’s well-browned, and those tasty brown bits have formed on the surface of the pan.
-
Remove the Main Ingredient: Once your primary ingredient is cooked and set aside, you should see a pan covered in brown bits. This is the foundation of your flavor-packed sauce.
-
Add the Liquid: Reduce the heat to medium, and pour your chosen deglazing liquid into the pan. The liquid will sizzle and steam, so be careful.
-
Scrape the Goodness: As the liquid sizzles, use your wooden spoon or spatula to gently scrape the bottom of the pan, freeing those flavorful bits.
-
Simmer and Reduce: Allow the liquid to simmer and reduce slightly. This concentrates the flavor. Stir occasionally, integrating the released brown bits into the liquid.
-
Season and Finalize: Now’s the time to taste your creation and adjust the seasoning with salt, pepper, or herbs. If you desire a thicker sauce, you can whisk in a small amount of butter or flour to reach your preferred consistency.
-
Combine and Serve: Finally, you can either add the main ingredient back into the pan to soak up the sauce or pour the sauce over your dish.
Tips for Successful Deglazing
-
Choose the Right Pan: Not all pans are suitable for deglazing. Avoid non-stick pans as they don’t develop those flavorful bits as well as stainless steel or cast iron pans do.
-
Be Mindful of the Liquid Temperature: If your liquid is too cold, it might take longer to reduce and might lead to tough meat if you add it back to the pan. Warm your deglazing liquid slightly before adding it to the pan.
-
Experiment With Liquids: While wine and stock are popular choices, don’t be afraid to try different liquids to see how they influence the sauce’s flavor. Apple cider can add a nice tang to pork dishes, for example.
Deglazing: Beyond Sauces
While making richer sauces is the most common use for deglazing, this technique also cleans your pan, making post-cooking cleanup much easier. Plus, it’s a sustainable cooking practice, ensuring you use all the flavor your ingredients offer, reducing waste.
Conclusion
Mastery of deglazing opens up a world of culinary possibilities. This simple technique enriches your dishes, turning everyday meals into gourmet experiences. The next time you find yourself with a pan of brown bits after searing or frying, see it not as a cleaning chore, but as an opportunity to elevate your dish. Start experimenting with deglazing and watch how it transforms your cooking. You’re not just making dinner; you’re crafting experiences, one rich, flavorful sauce at a time.