How to Use Bokeh Effects to Focus on Food in Photography
Food photography has evolved into an art form all its own, compelling viewers with mouth-watering captures of culinary delights. One technique that elevates the allure of food images is the use of bokeh – a visually appealing effect that blurs the background, making the subject stand out starkly against a dreamy backdrop. If you’re looking to embrace this technique in your food photography, here’s a beginner’s guide to mastering the art of bokeh and making your food shots truly irresistible.
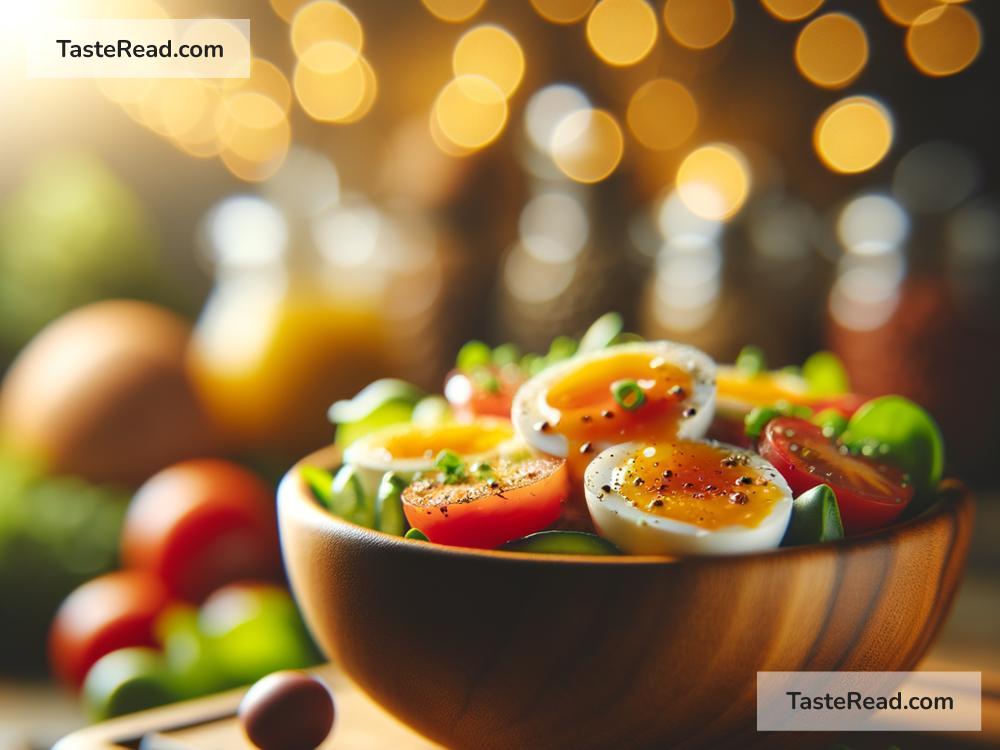
Understanding Bokeh
The term “bokeh” comes from the Japanese word “boke,” which means “blur” or “haze.” In photography, it describes the quality of the out-of-focus areas in a photo. Bokeh creates a soft, aesthetic background, drawing the viewer’s focus to the main subject with greater intensity.
Choosing the Right Equipment
The secret to achieving beautiful bokeh starts with your lens. Fast lenses with wide apertures (low f-numbers, like f/1.8, f/2.8) are ideal because they can create a shallower depth of field. Prime lenses, known for their fixed focal lengths, typically offer wider apertures and thus are excellent for bokeh photography. Don’t worry if you can’t access professional gear; many smartphones today offer a “Portrait” mode that simulates this effect by blurring the background digitally.
Setting Up Your Shot
-
Aperture Priority Mode: Start by setting your camera to Aperture Priority mode (often denoted as AV or A on the mode dial). This allows you to control the aperture, while the camera automatically adjusts the shutter speed for proper exposure. Choose the widest aperture available on your lens to decrease the depth of field, making your food the clear star of the show.
-
Distance Matters: Position your subject (the delicious dish you’re photographing) away from the background. The greater the distance between your subject and the backdrop, the more pronounced the bokeh effect. Also, get closer to your subject; this further enhances the effect by minimizing the depth of field.
-
Lighting: Soft, natural light works best for food photography. If possible, set up your shot near a window. The subtle play of light and shadow can add depth to your photo, and the bokeh will look most natural under such lighting conditions.
Composition and Framing
When it’s time to frame your shot, think about what elements you want in focus. Usually, this would be the most enticing part of the dish – perhaps the glossy glaze on a freshly baked pastry or the vibrant colors of fresh fruits and vegetables. Experiment with different angles and compositions to find what best highlights the allure of the dish while keeping unnecessary distractions out of focus.
Editing and Enhancing
After capturing your photo, a bit of post-processing can further enhance the bokeh effect. Many photo editing software and apps allow you to adjust the level of background blur, add bokeh shapes (like hearts or stars), and tweak the colors to make your food pop even more. Remember, moderation is key; your goal is to complement the natural beauty of the food, not overshadow it.
Tips for Stunning Bokeh Food Photography
- Experiment with Backgrounds: Different textures and colors can either make your subject pop or provide a distracting background. Experiment with plain versus textured backgrounds to see what enhances your subject best.
- Add Sparkle: Elements like glasses, utensils, or glossy foods can catch light and add pleasing bokeh highlights to your shot.
- Keep It Simple: Don’t overload the frame. Bokeh works best when the subject is the sole focus, making the dish look more tantalizing and desirable.
Conclusion
Mastering bokeh in food photography might seem daunting at first, but with patience and practice, you can produce stunning, professional-looking images that make viewers hungry with a glance. Remember, the goal is to make the food the star of your photo, with the bokeh effect skillfully used to highlight its beauty and distinctiveness. So grab your camera, and let’s make some mouth-watering pictures!