How to Use Motion Blur to Capture the Movement of Food
Capturing the movement of food in photography can transform an ordinary photo into a stunning snapshot of time, energy, and appetizing dynamics. One of the most effective techniques to achieve this is by using motion blur. Motion blur isn’t about making your picture look out of focus or fuzzy; it’s about adding a sense of speed and action to your images. Let me guide you through the process of using motion blur to capture the lively dance of food in a straightforward and fun way.
What is Motion Blur?
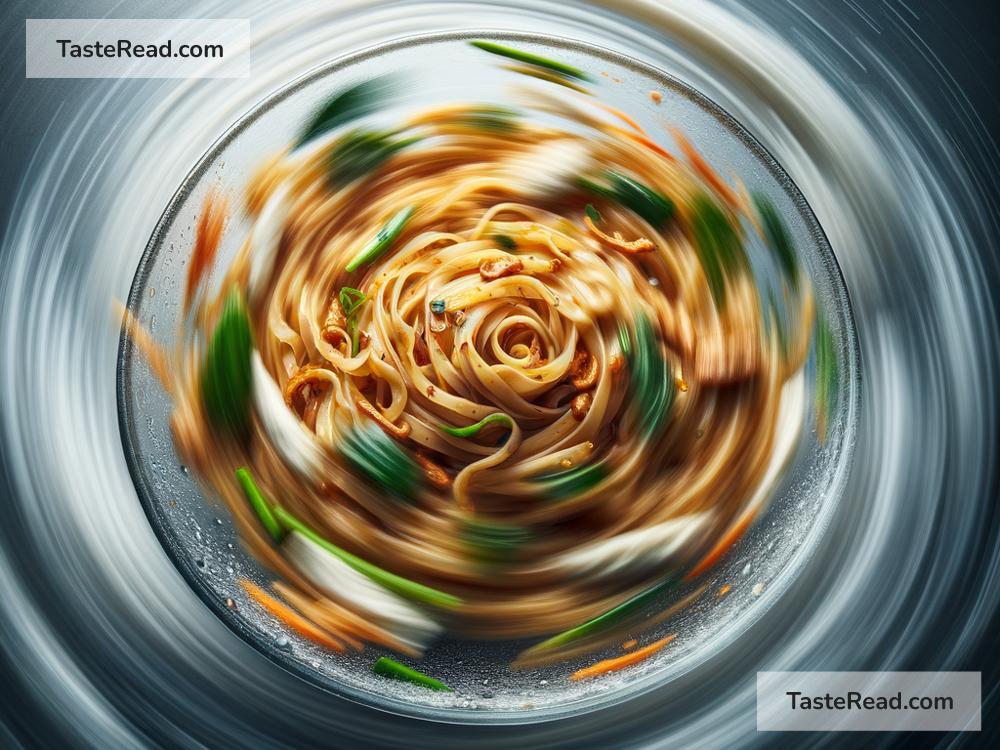
First things first, motion blur occurs when an object is moving fast enough that it appears blurry in the photo. This effect can make your food photos look dynamic and lively. For example, imagine capturing the moment when flour is being sifted onto a pizza base in mid-air or when chocolate sauce is lavishly drizzling over a creamy scoop of ice cream.
Step 1: Understand Your Equipment
You don’t need a super fancy camera to start. However, having a camera that allows you to adjust settings manually will give you more control over the outcome. A tripod is also a fantastic tool to stabilize your camera, ensuring that only the food’s movement is blurred, not the whole image.
Step 2: Setting Up Your Camera
To create motion blur, you need to play around with your camera settings, specifically the ‘shutter speed’. Shutter speed controls how long your camera’s shutter remains open to let light in. A slower shutter speed means that the shutter is open longer, which captures the movement as a blur. Start with a shutter speed of 1/15th of a second and adjust from there. Remember, the slower the shutter speed, the more pronounced the motion blur.
Step 3: Lighting is Key
Good lighting is crucial for capturing motion blur. You want enough light to illuminate your subject but not so much that it washes out the details. Natural light works best, but if you’re indoors, try using a bright but diffused light source. The goal is to have a well-lit scene to avoid unnecessary grain in your image.
Step 4: Capturing the Motion
Now comes the fun part – capturing the action! If you’re photographing something like pouring liquid, sprinkling spices, or dropping berries into a bowl of yogurt, you’ll need a bit of timing and practice. Press the shutter button right as the action begins, and don’t be afraid to take multiple shots to get the perfect one. Using a tripod will help keep everything else in the photo sharp and in focus, enhancing the effect of the motion blur.
Step 5: Experiment with Different Speeds and Movements
Motion blur isn’t a one-size-fits-all technique, so feel free to experiment. Try different shutter speeds to see how they affect the amount of blur in your images. Also, don’t limit yourself to just vertical or horizontal motion. Circular movements or even a gentle shake can produce fascinating blur effects.
Step 6: Editing Your Photos
After capturing your shots, a little bit of editing can make them pop even more. Software like Adobe Photoshop or Lightroom allows you to adjust the brightness, contrast, and saturation to highlight the motion blur. Remember, the goal is to complement the blur, not overpower it.
Final Thoughts
Using motion blur is a creative way to bring your food photographs to life. It adds a storytelling element, showcasing the beauty and dynamism of culinary arts. And the best part? It’s incredibly fun to experiment with. Don’t get discouraged if your first few attempts don’t turn out as expected. Photography is a game of patience and practice. With time, you’ll learn how to perfectly balance your camera settings, lighting, and timing to capture the exquisite motion of food. So grab your camera, get in the kitchen, and start capturing the delightful dance of your favorite dishes!