Title: Mastering Negative Space for Impactful Food Photography
As a food lover or a professional in the culinary world, the ability to capture mouth-watering photographs of food is a skill worth mastering. With platforms like Instagram and Pinterest booming with vibrant images of dishes, it’s crucial to make your food photography stand out. One effective technique to achieve this is by using negative space in your compositions. But what exactly is negative space, and how can it elevate your food photos? Let’s break it down in simple English.
Understanding Negative Space
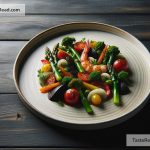
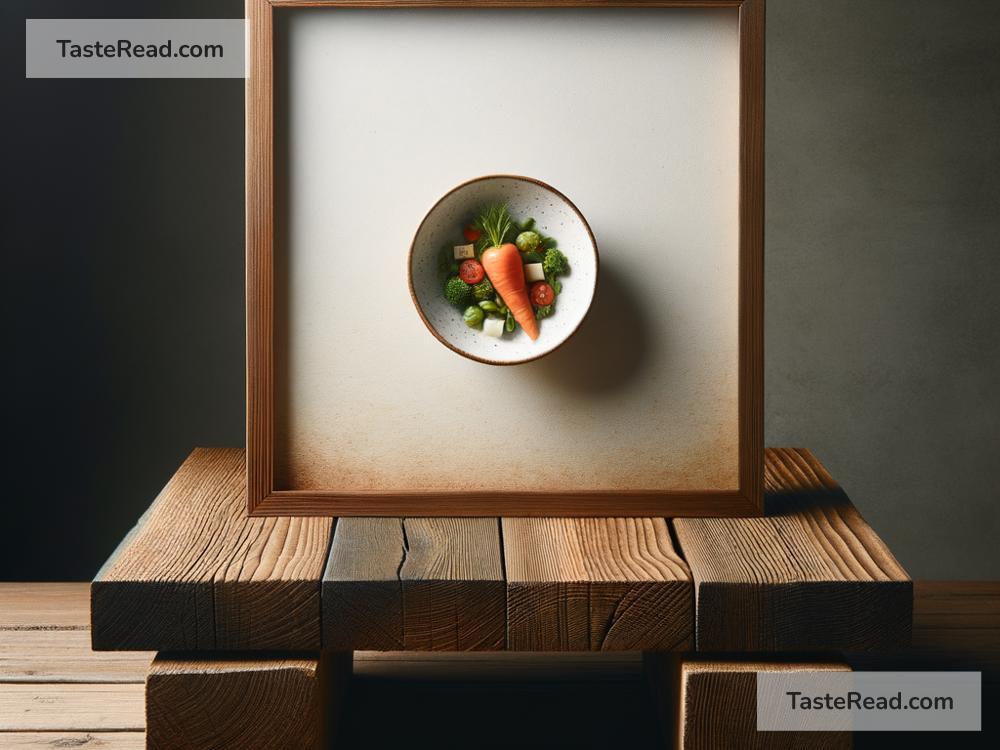
Negative space, often referred to as white space, is the area surrounding the main subject of your photograph. Contrary to what the name might imply, this space doesn’t need to be white. It can be any color, texture, or even a shadowy backdrop, as long as it serves to highlight your main subject, which in this case is food. The key idea is that ‘less is often more.’ By incorporating ample negative space around your dish, you direct the viewers’ attention exactly where you want it.
Why Use Negative Space in Food Photography?
-
Focus on the Dish: The primary benefit of using negative space is that it focuses the viewer’s attention on the dish. It cuts out the clutter and makes the food the star of the show.
-
Evokes Emotion: Negative space can create a mood around the food, whether it’s a feeling of luxury, freshness, or homeliness. This emotional pull can make your food photography more appealing and memorable.
-
Professional Aesthetic: Images with well-utilized negative space have a professional and clean look. This simplicity is key in making your photographs more compelling and visually appealing.
How to Use Negative Space Effectively
1. Plan Your Composition: Before you shoot, think about the composition of your photograph. Decide on what aspect of the dish you want to emphasize and position it accordingly. For instance, placing your dish off-center and allowing a significant amount of blank space around it can create a striking visual impact.
2. Choose the Right Background: The background plays a crucial role in defining the negative space. Opt for solid colors or simple textures that do not compete with the main subject. A plain backdrop can magnify the beauty of your dish without being distracting.
3. Experiment with Different Angles: The angle of your shot can greatly influence the effect of negative space. Top-down (or flat lay) perspectives work wonderfully in emphasizing negative space, giving a neat and clean appearance to your food photographs.
4. Pay Attention to Lighting: Good lighting is non-negotiable in making the most of negative space. Natural light is usually the best choice for food photography as it softly illuminates the dish and the surrounding space, enhancing the overall composition.
5. Minimal Props: If you decide to use props, ensure they are minimal and complement the dish without overcrowding the scene. Sometimes, a simple fork, a napkin, or a few scattered ingredients related to the dish can add context without reducing the impact of the negative space.
6. Post-Processing: Finally, don’t underestimate the power of post-processing. While it’s best to get the composition right in the camera, editing tools can help you adjust the brightness, contrast, and crop to accentuate the negative space even more.
Conclusion
Mastering the art of using negative space can transform your food photography from good to outstanding. It’s a powerful technique that not only highlights your culinary creations but also gives them an artistic edge. Start by observing the negative space in food photographs you admire, and practice incorporating these principles into your own work. Like any other skill, it might take a bit of trial and error, but the outcome will surely be worth it. Remember, in the world of food photography, sometimes what you leave out is just as important as what you capture. Happy shooting!