Whipping cream to the perfect consistency can transform a simple dessert into a sublime experience. Imagine dolloping a cloud-like, fluffy cream atop a slice of pie or having it cuddle a warm cup of hot chocolate. Achieving that dreamy texture might seem daunting, but with the right instructions and a little practice, you’ll be whipping cream like a pro in no time. Here’s how to whip cream to perfection using simple English, ensuring your desserts are the talk of the table.
Step 1: Choose Your Cream
First, it’s all about picking the right cream. Look for “heavy cream” or “heavy whipping cream” with a fat content of around 36% or higher. This high-fat content is crucial because it’s the fat that gets whipped up into those luscious peaks. Lower-fat creams won’t hold up as well and can leave you with a less satisfying result.
Step 2: Chill Everything
Before you start, make sure your cream is cold. In fact, the colder, the better. It’s also a great idea to chill your bowl and beaters (or whisk) in the freezer for about 15 minutes before you start. Cold tools help keep the fat in the cream hard, which makes it easier to whip to the right texture.
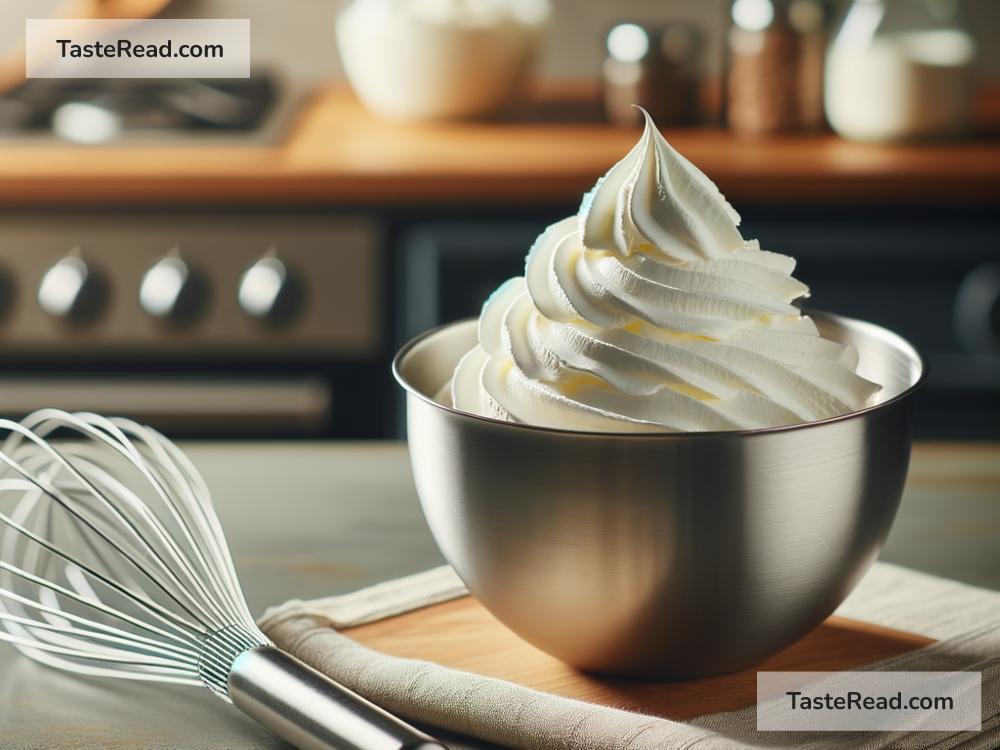
Step 3: Start Whipping
Pour the chilled cream into your bowl. If you’re adding sugar or vanilla for sweetness, do it now. Use about 1 tablespoon of sugar and 1 teaspoon of vanilla extract for every cup of cream, but you can adjust to taste.
Begin whipping your cream on a low speed if you’re using an electric mixer, or, if you’re going the manual route with a whisk, start with quick, sharp strokes. Starting slowly allows the cream to start building structure without splashing everywhere.
Step 4: Watch for Stages
As you whip, you’ll notice the cream going through several stages. First, it’ll become bubbly, then it’ll start to thicken up. Keep going until it starts to leave trails or “tracks” in the cream. This is a good sign—you’re getting close.
The key here is not to overbeat. You’re aiming for what’s called “soft peaks,” which means when you lift your whisk or beaters, the cream forms peaks that gently fold over at the tips. For most desserts, this is the sweet spot, literally and figuratively. It means your cream is airy and light but still has enough structure to hold up on top of desserts. If you prefer a stiffer cream, continue whipping to “stiff peaks,” where the peaks stand up straight without collapsing. But be cautious: if you go too far, the cream will turn into butter.
Step 5: Finish and Use
Once you’ve reached your desired peak stage, stop whipping. Overbeating can quickly lead the cream to turn grainy and, eventually, into butter, as mentioned before. If you accidentally overdo it, you can try to salvage it by gently folding in a little more liquid cream to smooth it out. But it’s a delicate balance, so it’s best to avoid getting to that point.
Now, your whipped cream is ready to serve. Spoon it over desserts, fruits, or beverages. Remember, freshly whipped cream is at its best soon after it’s made, as it can start to lose its volume and weep liquid over time.
Tips for Success
- Add a stabilizer such as powdered sugar or a spoonful of mascarpone cheese for whipped cream that holds up longer.
- Experiment with flavors by incorporating extracts, spices, or liqueurs into the cream as you whip it.
- Besides sweets, whipped cream can be a luxurious addition to savory dishes. Just skip the sugar and vanilla, and instead, add a pinch of salt or some finely minced herbs.
Whipping cream to perfection isn’t just about the technique; it’s also about understanding the stages of whipped cream and knowing what you’re aiming for. With practice, you’ll start to recognize these stages by both sight and feel, making it easier to whip up perfect cream every time. So, grab your whisk (or mixer), and let’s make your desserts even more delightful with homemade whipped cream!