Mastering the Technique of Poaching Eggs Without Ruining the Yolk
Poaching eggs can seem like one of those kitchen tasks reserved for the pros. You’ve got to deal with hot water, vinegar, and the delicate balance of time, all while trying to keep that yolk perfectly runny. But fear not! Mastering the poached egg is less about having fancy skills and more about knowing a few simple tricks. Let’s break down the process so you can achieve poached egg perfection without the stress.
1. Fresh is Best
Starting with the freshest eggs you can get your hands on is key. Fresh eggs have firmer whites, which will hold together better in the hot water. How do you know if your eggs are fresh? Do the water test! Place your egg in a bowl of water. If it sinks to the bottom and lays flat, you’re golden. If it floats, consider those eggs better suited for a different recipe.
2. The Vinegar Trick
Adding a little vinegar to your poaching water is like having a secret weapon. You only need about 1-2 tablespoons for a large pot of water. The acid in the vinegar helps the egg whites firm up more quickly, hugging the yolk and keeping it safe. Don’t worry; your eggs won’t taste like vinegar – it’s just there to lend a helping hand.
3. Water Temperature is Key
Forget about a rolling boil; when it comes to poaching eggs, it’s all about the simmer. You’re looking for those tiny bubbles that tell you the water is hot enough but not too hot. A furious boil is too aggressive for our delicate eggs and will likely tear them apart. A gentle simmer, on the other hand, will cradle the egg into a perfectly poached masterpiece.
4. The Whirlpool Method
Creating a whirlpool in your pot by stirring the water in a circular motion just before adding the egg can help the white wrap around the yolk, creating a neat and tidy package. It’s simple but effective. Crack your egg into a small bowl or cup first, then gently slip it into the center of the gently swirling water. This method requires a bit of practice, but once you’ve got it down, you’ll feel like a poaching wizard.
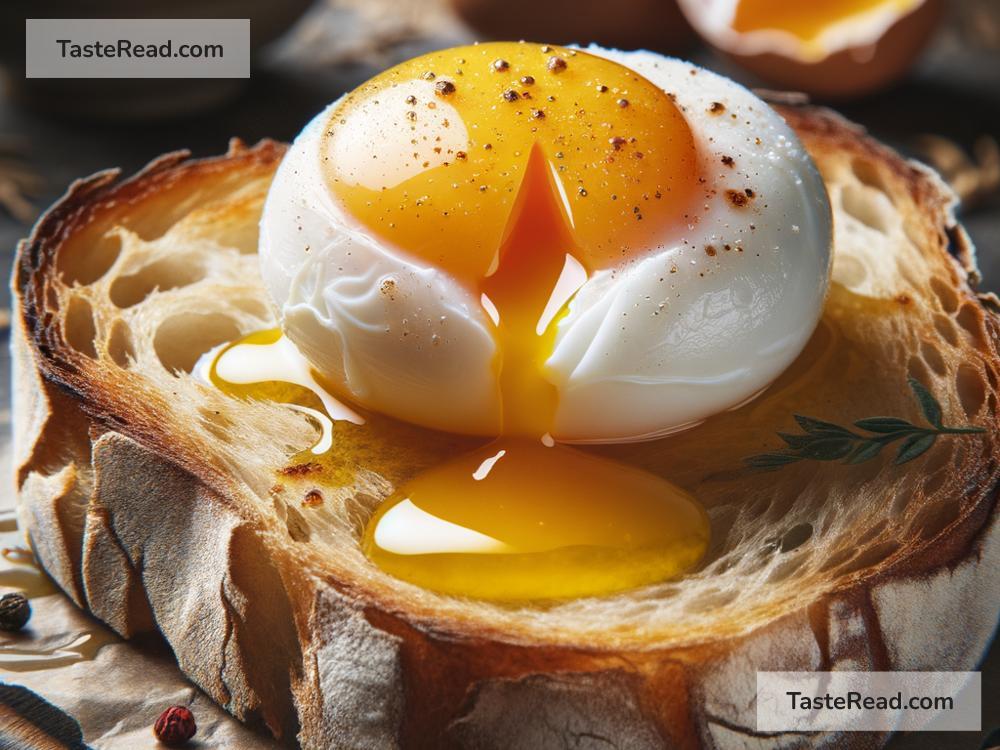
5. Timing is Everything
How long should you leave your egg in the simmering water? About 3-4 minutes should do the trick for a beautifully runny yolk, but if you prefer your yolk a bit more set, aim for 4-5 minutes. Don’t wander too far while your egg is poaching. Keeping an eye on the time will ensure your egg comes out the way you like it.
6. The Big Rescue
Once your egg is perfectly poached, it’s time for the rescue mission. Using a slotted spoon, gently lift your egg out of the water. Place it on a paper towel or clean kitchen towel to drain off any excess water – nobody likes a soggy toast moment. This step is also your chance to trim any wispy whites if you’re feeling extra fancy.
7. Season and Serve
Here comes the best part – eating! Poached eggs are incredibly versatile. A sprinkle of salt and pepper might be all you need, or you can get creative. Avocado toast with a poached egg on top? Classic. A simple salad with a runny yolk as a dressing? Delicious. The options are endless.
Practice Makes Perfect
Poaching eggs might not go perfectly on your first try, and that’s okay! The beauty of cooking is in the practice. Each egg you poach will teach you something new and bring you closer to mastering the technique. Remember, even the most experienced chefs had to start somewhere.
By following these simple steps, you’ll turn those intimidating eggs into delectable, Instagram-worthy breakfasts (or lunches, or dinners – we don’t judge) that will impress your friends and your taste buds. Happy poaching!