Making Zero-Waste Nut Milks at Home: A Complete Guide
In recent years, nut milks—alternatives to traditional dairy milk—have gained immense popularity. They’re not only a boon for those with lactose intolerance or vegan preferences but also for anyone looking to reduce their environmental footprint. However, commercially-made nut milks often come in packaging that isn’t exactly eco-friendly. That’s where the magic of making nut milks at home comes into play. Not only can you control what goes into your nut milk, making it at home allows you to greatly reduce waste, steering you closer to a zero-waste lifestyle. Let’s dive into how you can make your very own nut milks at home, easily and sustainably.
Why Go Zero-Waste?
Before we get into the ‘how’, let’s talk about the ‘why’. Going zero-waste means aiming to reduce what you send to landfills by making mindful choices that align with sustainable living. When it comes to nut milks, buying them from the store often means dealing with cartons, many of which are not fully recyclable due to their composite nature. Making nut milk at home cuts down on this waste and also eliminates the environmental cost of transporting these products from the manufacturer to your home.
Choosing Your Nuts
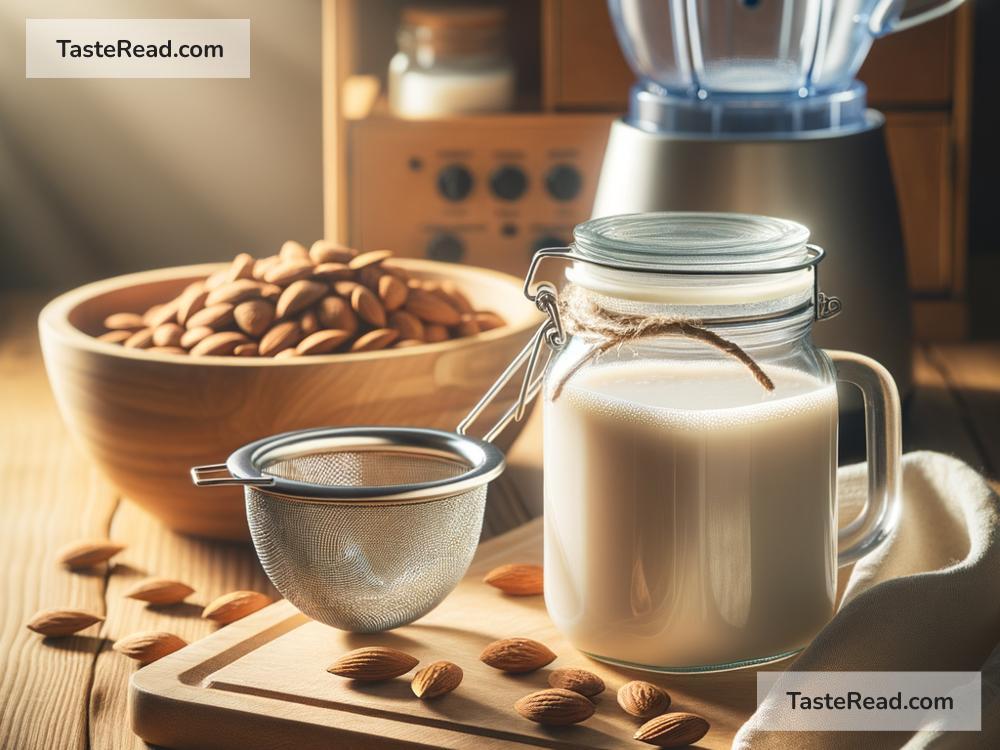
The first step to making nut milk is, as you guessed, choosing your nuts. Almonds, cashews, and hazelnuts are popular choices, but don’t feel limited—walnuts, macadamias, and even pecans can make delicious milks. When possible, opt for nuts that are organic, to ensure you’re not consuming pesticides or chemicals. Buying in bulk, with your own reusable bags or containers, can also cut down on packaging waste. Remember, variety is the spice of life, so feel free to experiment with different types!
Preparation is Key
Most nuts will require some prep before you can turn them into milk. This usually means soaking them in water for a few hours or overnight. Soaking improves their digestibility and makes them easier to blend. Just place your nuts in a bowl, cover them with water, and leave them to soak. When they’re ready, drain the soaking water—it’s great for watering plants, so don’t throw it away!
Blending Time
Once your nuts are soaked and drained, it’s time to blend. For most nut milks, you’ll want about a 1:4 ratio of nuts to water. So, if you have a cup of nuts, you’ll blend them with four cups of water. Put the nuts and water into a blender and let it rip until the mixture looks creamy and smooth. This usually takes about two minutes, but the exact time can depend on your blender’s power.
Straining for Smoothness
To achieve that smooth, milk-like consistency, you’ll need to strain your blended nuts. Cheesecloth or a nut milk bag works perfectly for this. Simply pour the mixture through your chosen strainer into a bowl or jug beneath. What’s left in the strainer is pulp—don’t throw this away! We’ll talk about what to do with it in just a moment.
Flavoring Your Milk (Optional)
This is where you get to customize. You can add a touch of sweetness with a bit of maple syrup, honey, or dates. Vanilla extract or a pinch of salt can also enhance the flavor of your nut milk. Just add your chosen ingredients to the strained milk and blend again briefly to combine everything. Remember, these steps are optional; your nut milk can be just as delicious without them.
Zero-Waste: What to Do with the Pulp
Now, about that leftover pulp. Throwing it away would hardly be zero-waste, but luckily, there are many ways to use it. Nut pulp can be added to baked goods, like bread, muffins, or cookies, for added texture and nutrition. It can also be used in smoothies, oatmeal, or granola. Some even make it into nut cheese. The possibilities are nearly endless, proving that zero-waste living can also mean zero-waste cooking.
Storing Your Nut Milk
Your homemade nut milk can be stored in the refrigerator for up to five days. Make sure to use an airtight container, and give it a good shake before use as it may separate over time—which is perfectly normal for homemade milks.
Conclusion
Making your own nut milk is an enriching experience that not only reduces waste but also adds a personalized touch to your diet. It’s a simple yet effective step towards a more sustainable lifestyle, empowering you to take control of what you consume and its impact on the environment. So next time you reach for a carton of store-bought nut milk, remember: making it at home can be just as easy, delicious, and far more rewarding.