How to Create Crunchy Peanut Butter Chocolate Energy Balls: A Simple Guide
In a world where busy schedules often trump healthy eating habits, finding quick, nutritious snacks can be a game-changer. Crunchy peanut butter chocolate energy balls are not just a treat for your taste buds but also a powerhouse of energy. These little delights are perfect for anyone looking for a nutritious snack or a quick energy boost without reaching for less healthy options. The best part? You don’t need to be a culinary expert to whip these up! Let’s dive into how you can create these scrumptious energy balls in a few simple steps.
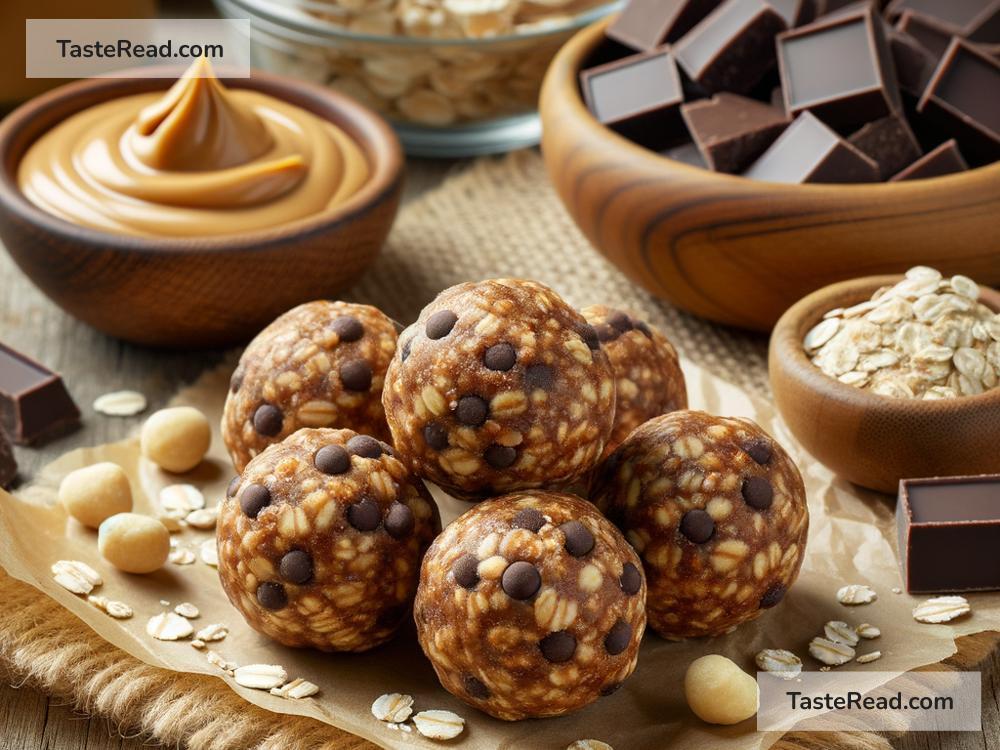
Ingredients You’ll Need:
- 1 cup oats (preferably old-fashioned for that extra crunch)
- 1/2 cup crunchy peanut butter (natural works best)
- 1/3 cup honey or maple syrup (for a natural sweetener)
- 1/2 cup mini chocolate chips (dark chocolate chips for a healthier option)
- 1 teaspoon vanilla extract (adds flavor)
- A pinch of salt (to enhance the flavors)
- Optional add-ins: Chia seeds, flaxseeds, or hemp seeds for an extra nutritional punch
Equipment You’ll Need:
- A large mixing bowl
- A spatula or a spoon
- Measuring cups and spoons
- Parchment paper
- A baking sheet or plate
Step-by-Step Guide to Creating Your Energy Balls:
1. Mix Your Dry Ingredients: Start by pouring the oats, chocolate chips, and a pinch of salt into your mixing bowl. If you’re including chia seeds, flaxseeds, or hemp seeds, add them here. This is where you get to customize your energy balls to your taste and nutritional preferences. Give these dry ingredients a good stir to ensure they’re well mixed.
2. Add the Wet Ingredients: Now, introduce the crunchy peanut butter, honey (or maple syrup), and vanilla extract into the bowl. These ingredients will act as the glue that holds everything together, so make sure you blend them thoroughly with the dry mix. Don’t be afraid to get a little messy and use your hands; it’s often the best way to ensure everything is well combined.
3. Chill the Mixture: This step isn’t mandatory, but if you find the mixture too sticky to handle, pop it into the refrigerator for about 30 minutes. Chilling will make the mixture firmer and easier to shape into balls.
4. Roll into Balls: Once the mixture has the right consistency, start scooping small portions and roll them between your palms to form balls. Aim for bite-sized pieces — about an inch in diameter is perfect. If the mixture sticks to your hands, wetting them slightly helps handle the mix better.
5. Let Them Set: Place the formed energy balls on a plate or baking sheet lined with parchment paper. If you’re not in a hurry, you can let them set at room temperature. For quicker setting, or if you prefer them a bit firmer, refrigerate for an hour.
6. Store and Enjoy: After they’ve set, your energy balls are ready to be enjoyed. For storage, keep them in an airtight container in the refrigerator. They should stay fresh for up to a week, ensuring you have a quick snack or energy boost within reach for days.
Customize Your Energy Balls:
One of the joys of making these energy balls is how customizable they are. Don’t have crunchy peanut butter? Use smooth. Not a fan of honey? Maple syrup is a fantastic alternative. You can also experiment with different types of nut butter, seeds, or even dried fruits to make your perfect energy ball version. The possibilities are as endless as they are delicious.
Final Thoughts:
Creating crunchy peanut butter chocolate energy balls is not just simple; it’s a fun activity that pays off with a nutritious snack perfect for busy days. They’re compact, easy to make, and packed with ingredients that offer a blend of good fats, fibers, and proteins. So, the next time you find yourself reaching for a less-than-healthy snack, remember that these energy balls are a quick and tasty alternative that will keep you fueled and satisfied. Happy snacking!