How to Make a Fluffy Sponge Cake with Fresh Cream Filling
Baking a fluffy sponge cake filled with fresh cream isn’t just a treat for your taste buds; it’s also a delightful trip to the heart of home baking. Whether it’s for a birthday, an afternoon tea, or just because you feel like whipping up something sweet and satisfying, a light-as-air sponge cake with a lush cream filling is always a winning choice. Even if you’re new to the world of baking, this guide will take you through each step to ensure your sponge cake is perfect every time.
Ingredients You’ll Need:
For the Sponge Cake:
– 4 large eggs
– 1 cup (200g) of sugar
– 1 cup (125g) of all-purpose flour
– 1 tsp of baking powder
– ¼ cup (60ml) of milk
– ½ tsp of vanilla extract
For the Fresh Cream Filling:
– 1 cup (240ml) of heavy whipping cream
– 2 tbsp of powdered sugar (adjustable to taste)
– ½ tsp of vanilla extract
Let’s Bake!
-
Preparation Time: First things first, get your oven preheated to 350°F (180°C). While it’s warming up, grab a 9-inch (23 cm) round baking pan and line it with parchment paper, or simply grease it with a bit of butter and dust it with flour to prevent sticking. This step ensures your cake comes out smoothly once it’s baked.
-
Beat Those Eggs: Crack the eggs into a large mixing bowl and beat them with an electric mixer at high speed. Gradually add the sugar to the eggs and continue beating until the mixture is pale, thick, and has doubled in volume. This process is crucial for achieving that fluffy texture we’re after.
-
Mix Dry Ingredients: In a separate bowl, sift together the flour and baking powder. Sifting not only removes any lumps but also aerates the flour, contributing to a lighter cake.
-
Combine: Gently fold the sifted dry ingredients into the egg mixture, using a spatula in a circular motion from the bottom up. This method helps to keep the mixture airy. Warm the milk just slightly (it should be warm, not hot) and stir in the vanilla extract; gently fold this into the batter too. Be gentle to avoid deflating the mixture.
-
Bake: Pour the batter into your prepared pan and smooth the top with a spatula. Bake in your preheated oven for about 25-30 minutes, or until a toothpick inserted into the center comes out clean. After baking, let the cake cool in the pan for a few minutes, then transfer it to a wire rack to cool completely.
-
Make the Fresh Cream Filling: While your cake is cooling, prepare the fresh cream filling. In a cold bowl, whip the heavy whipping cream until soft peaks form. Add the powdered sugar and vanilla extract, then continue whipping until stiff peaks form. Taste and adjust sweetness if needed.
-
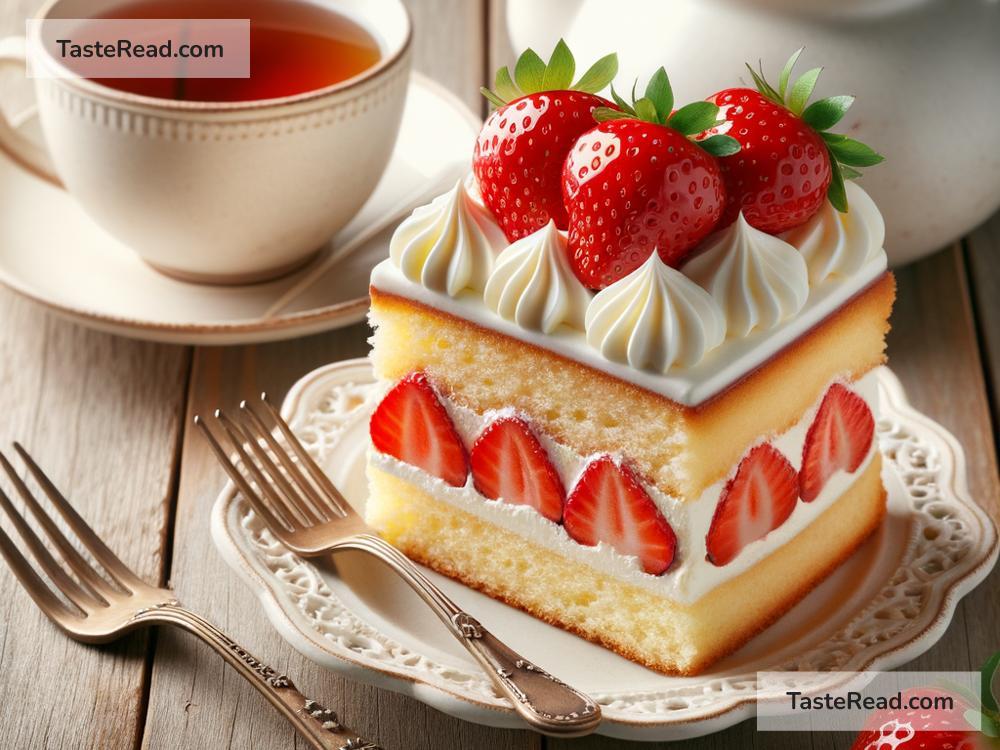
Assemble the Cake: Once the sponge cake has completely cooled, carefully slice it horizontally into two equal layers. Spread the fresh cream filling over the bottom layer, then gently place the top layer over it. For an extra touch, you can dust the top of the cake with powdered sugar or decorate it with fresh fruits.
Expert Tips for Success:
- Use Room Temperature Ingredients: Except for the heavy cream (which should be cold for whipping), make sure the rest of your ingredients are at room temperature. This helps them to combine more evenly, contributing to a better rise.
- Do Not Over-Mix: Whether you’re folding in dry ingredients or combining the cake batter with milk, do so gently. Over-mixing can knock out the air you’ve worked so hard to incorporate.
- Cool Completely Before Filling: Patience is key. If the cake isn’t completely cool before you add the cream, it can melt and make a mess.
Serving and Enjoyment:
Once assembled, your sponge cake with fresh cream filling is ready to impress. This cake is best enjoyed within a day or two of making it, stored in the refrigerator if not consumed right away. Whether you’re serving it at a special occasion or with a simple pot of tea, it’s sure to bring smiles all around.
Baking a sponge cake with a fresh cream filling from scratch might seem daunting, but it’s a rewarding experience that gets easier with practice. Each step, from beating the eggs to folding in the flour, builds your expertise as a home baker. So, don your apron and get ready to enjoy the delicious fruits of your labor. Happy baking!