Step-by-Step Guide to Crafting Authentic Turkish Baklava
If you’ve ever tasted baklava, you’ve likely been swept away by its perfect combination of crispy layers, sweet syrup, and nutty filling. Turkish baklava, in particular, is loved worldwide for its rich flavor and delicate texture. Making baklava at home might seem intimidating, but with a little patience and the right guidance, you can create this delicious dessert in your own kitchen. This step-by-step guide will walk you through the basics and help you craft authentic Turkish baklava with ease.
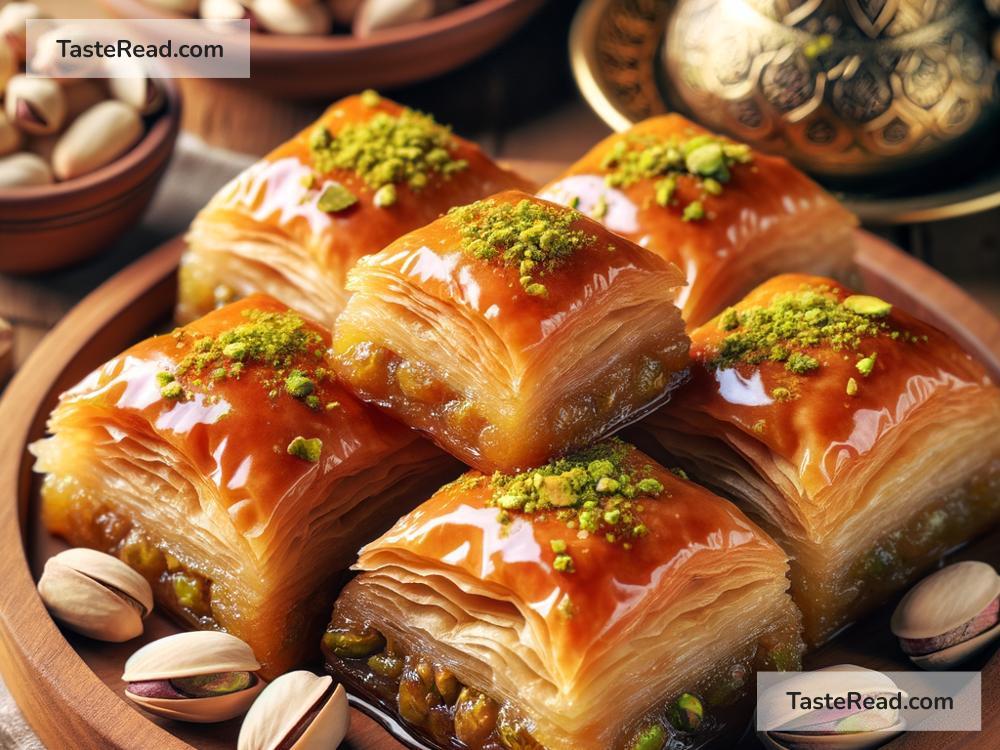
What is Baklava?
Baklava is a layered pastry dessert made with thin sheets of phyllo dough, filled with nuts, and sweetened with syrup. It’s a staple in Turkish cuisine and often served during special celebrations, holidays, or alongside Turkish tea. The key to authentic Turkish baklava is achieving perfectly crisp phyllo layers and balancing sweetness with the rich nuttiness of the filling.
Ingredients You’ll Need
Before you start, gather the ingredients below. Many of them are easy to find at your local grocery store:
- Phyllo Dough: 1 package (store-bought is fine, or you can make it from scratch if you’re ambitious!)
- Unsalted Butter: 200g, melted (important for brushing between layers)
- Nuts: 2 cups (traditionally pistachios, walnuts, or a mix; ground or finely chopped)
- Granulated Sugar: 1 cup
- Water: 1 cup
- Honey: 2 tablespoons (or you can skip this and use more sugar for a syrup-only recipe)
- Lemon Juice: 1 teaspoon
- Ground Cinnamon: Optional, for extra flavor
- Salt: A pinch
- Baking Dish: Use a rectangular or square pan (usually 9×13 inches works well).
Step-by-Step Instructions
Step 1: Prepare the Nut Filling
- Take your pistachios and/or walnuts and pulse them in a food processor until finely chopped. You don’t want a powder; some texture is great.
- Mix the nuts with a pinch of salt and ground cinnamon (if you’re using it). Set the mixture aside—this will be your filling.
Step 2: Make the Syrup
- Combine sugar, water, and lemon juice in a saucepan. Bring it to a boil over medium heat.
- Once boiling, reduce the heat and simmer for 10 minutes, stirring occasionally.
- Add honey to the syrup and stir for another 2 minutes. Then, remove from heat and let the syrup cool. This syrup will be poured over your baklava later.
Step 3: Prepare the Phyllo Dough
- If you bought frozen phyllo dough, let it thaw according to the instructions on the package. Once thawed, unroll the sheets and keep them flat.
- Cover the phyllo sheets with a damp kitchen towel to prevent them from drying out while you work. Phyllo dough dries quickly, so this step is important.
Step 4: Assemble the Baklava Layers
- Preheat the oven to 325°F (160°C).
- Brush melted butter onto the bottom of your baking dish.
- Take one sheet of phyllo dough and lay it flat in the dish. Brush butter generously over the sheet. Repeat with about 8 sheets for the base, buttering each one.
- Sprinkle a layer of the nut mixture evenly on top of the buttered phyllo layers.
- Add another 6–8 sheets of phyllo dough on top of the nuts, buttering each layer as you go.
- Repeat the nut-and-phyllo process until you’ve used all the filling. Finish with another 8 sheets of phyllo dough for the top layer, buttering each sheet.
Step 5: Slice the Baklava
- Before baking, use a sharp knife to cut the baklava into small diamond or square shapes. This helps the syrup seep in evenly later and makes serving easier.
- Cut all the way through to the bottom of the pan.
Step 6: Bake the Baklava
- Place the pan in the preheated oven and bake for about 45 minutes to 1 hour, or until the top layer is golden brown and crisp.
Step 7: Add the Syrup
- As soon as the baklava comes out of the oven, pour the prepared syrup evenly over the top while it’s still hot. The syrup will soak into the layers, adding sweetness and moisture.
- Let the baklava cool completely before serving. This can take a few hours, but it’s worth the wait!
Tips for Success
- Work Quickly with Phyllo Dough: Phyllo dries out quickly, so keep it covered with a damp towel while you’re assembling the baklava.
- Don’t Skimp on Butter: Butter ensures the layers are crispy and flavorful. Generously brush each sheet!
- Adjust Sweetness: If you prefer less sweetness, reduce the amount of sugar in the syrup.
- Make Ahead: Baklava tastes even better the next day, so you can make it ahead of time and store it at room temperature.
Serving Turkish Baklava
Once cooled, serve your baklava with Turkish tea or coffee for an authentic experience. The crispy layers, nutty filling, and sweet syrup will melt in your mouth, providing the perfect balance of flavors.
Conclusion
Crafting authentic Turkish baklava may take some time, but the results are truly rewarding. By following this step-by-step guide, you can enjoy this iconic dessert in the comfort of your home. Whether you’re making it for friends or family or simply treating yourself, homemade baklava is sure to impress. Give it a try, and enjoy the taste of Turkey right from your kitchen!