How to Create a Colorful Veggie Platter
A veggie platter is perfect for parties, family gatherings, or even a quick snack. It’s fresh, healthy, and looks stunningly beautiful when done right. The best part? It’s super easy to make! In this blog post, I’ll show you how to create a colorful veggie platter that’s not only healthy but also eye-catching. Let’s dive into it!
Why Choose a Veggie Platter?
Veggie platters are great because they offer a variety of fresh vegetables that everyone can enjoy. They’re packed with vitamins, minerals, and fiber, making them a guilt-free treat. Plus, they’re versatile! You can add dips and arrange the veggies in creative ways to impress your guests.
Step 1: Choose Your Vegetables
To make your platter colorful, pick veggies in different shades. Here’s a simple guide to choosing veggies by color:
- Red: Cherry tomatoes, red bell peppers, radishes.
- Orange: Carrots, orange bell peppers.
- Yellow: Yellow bell peppers, baby corn.
- Green: Cucumbers, celery, snap peas, broccoli.
- Purple: Purple cabbage, purple carrots, beets.
- White: Cauliflower, jicama.
You don’t need to include every single vegetable mentioned above, but try to pick a variety of colors for a vibrant look.
Step 2: Prep Your Veggies
Before assembling your veggie platter, it’s important to prep your vegetables. Here’s what to do:
- Wash everything thoroughly: Use cold water to wash the vegetables, removing any dirt or debris. Pat them dry with a clean towel.
- Peel and slice if needed: Some veggies, like carrots or cucumbers, might need peeling. Others, like bell peppers, need to be sliced into strips.
- Cut to bite-sized pieces: The vegetables should be easy to grab and eat. You can cut them into sticks, slices, rounds, or florets.
- Blanch if necessary: Certain veggies, such as broccoli or cauliflower, taste better if slightly cooked. Blanch them by boiling them briefly (1-2 minutes) and then transferring them to an ice bath to keep their crunch.
Step 3: Add a Dip
Every veggie platter needs a tasty dip to go with it! Here are some popular options:
- Hummus: Creamy and full of flavor, hummus is a classic choice. You can try flavored varieties like roasted red pepper or garlic hummus.
- Ranch dressing: Ranch pairs perfectly with raw veggies and is always a crowd-pleaser.
- Greek yogurt-based dip: Mix Greek yogurt with herbs, garlic, or a bit of lemon juice for a light and tangy option.
- Guacamole: For those who love avocados, guacamole is a flavorful and nutritious choice.
- Spinach or artichoke dip: If you want something savory and indulgent, these dips are fantastic.
You can serve multiple dips to give your guests more variety. Place the dips in small bowls so they’re easy to access.
Step 4: Assemble Your Platter
Now comes the fun part—arranging your platter! Follow these simple steps to make your veggie platter look vibrant and inviting:
- Pick a large plate or tray: Choose a platter big enough to hold all your vegetables and dips. Wooden boards, glass platters, or even colorful trays work perfectly.
- Start with dips: Place the bowls of dip in the center of your platter.
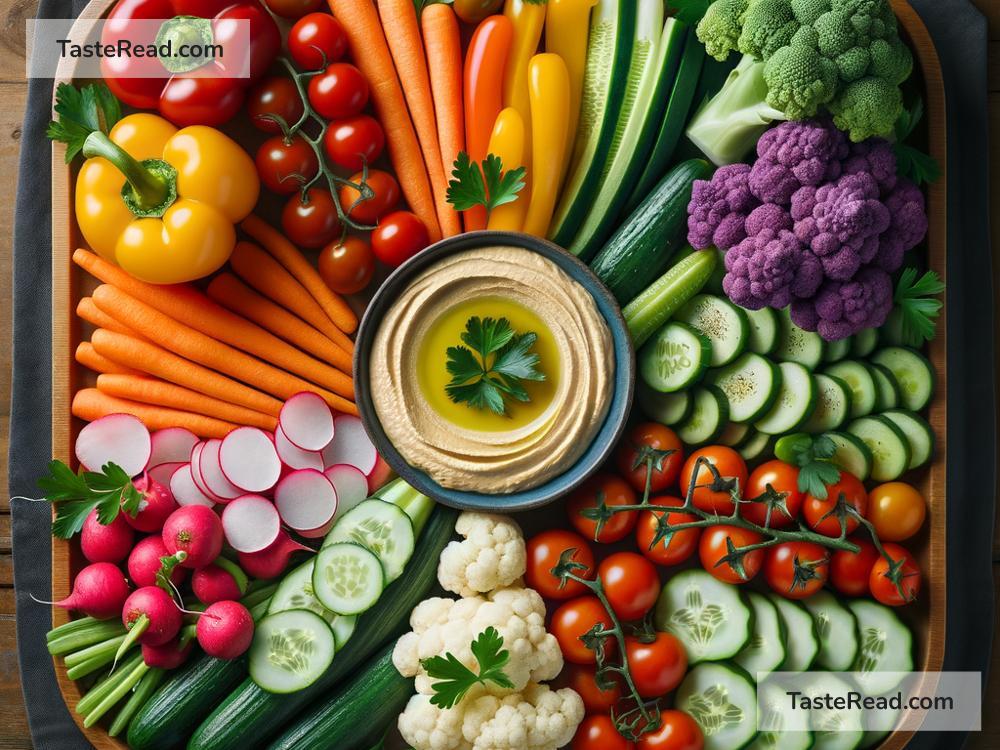
- Arrange veggies by color: Divide your platter into sections by color. For example, place the red veggies together, followed by orange, yellow, green, and purple. This arrangement creates a rainbow effect, making your platter look visually appealing.
- Mix shapes and textures: Alternate between sliced veggies, florets, and sticks to give variety to the presentation.
- Fill gaps: If you see any empty spaces, fill them with cherry tomatoes or slices of cucumber. Tight spacing makes the platter look full and abundant.
Step 5: Add Final Touches
Once your basic platter is ready, you can add extra decorations to make it more special. Here are some ideas:
- Garnish with fresh herbs: Sprinkle chopped parsley or cilantro for a pop of green.
- Add edible flowers: For a fancy touch, use edible flowers like nasturtiums.
- Include crunchy extras: Add a handful of nuts, seeds, or crackers around the edges for additional texture.
Step 6: Serve and Enjoy!
Your colorful veggie platter is ready to serve! Keep it fresh by wrapping it in plastic wrap and storing it in the fridge until it’s time to eat. Once you bring it out, watch as your guests admire the beautiful arrangement and dive into the healthy, delicious options you’ve provided.
Tips for Success
- Keep it fresh: Serve your platter within a few hours of assembling it to ensure the veggies look crisp and vibrant.
- Customize for your guests: If you know someone doesn’t like a certain veggie, skip it! You can add extras they love, like cherry tomatoes or cucumbers.
- Make it themed: If your event has a specific theme or holiday, use veggies that match the occasion. For example, red and green veggies are perfect for Christmas gatherings.
Conclusion
Creating a colorful veggie platter is easy, fun, and rewarding. With a mix of fresh vegetables, tasty dips, and a little creativity, you can make a platter that stands out and satisfies your guests. The vibrant colors make it a feast for the eyes, while the variety of veggies ensures everyone will find something they like.
So next time you’re hosting an event, don’t overlook the humble veggie platter. It’s healthy, beautiful, and always a hit. Give it a try—you won’t be disappointed!