How to Make Artisan Pickles at Home
Pickles are a timeless treat that can add a burst of flavor to just about any dish. From sandwiches to salads, pickles offer a tangy, crunchy delight that can brighten up your meal. Artisan pickles take this idea even further by using fresh ingredients, unique flavors, and a homemade touch to create truly special snacks. The best part? You can make artisan pickles right in your own kitchen! Let’s walk through the easy steps to create delicious homemade pickles.
What Are Artisan Pickles?
Artisan pickles are simply pickles made with care, creativity, and high-quality ingredients. Unlike store-bought pickles, which often use preservatives and artificial flavors, artisan pickles rely on fresh produce, natural spices, and a craft approach to pickling.
By experimenting with different ingredients, you can make pickles that cater to your tastes. Want a spicy garlic pickle? How about one with herbs like dill or thyme? With artisan pickling, the options are endless.
Why Make Pickles at Home?
Making pickles at home is:
- Cost-effective: Canning your own pickles can save money compared to buying high-end artisan pickles at stores.
- Customizable: You decide the flavors, spice level, and crunch.
- Fun and Rewarding: It’s a creative process that leaves you with something tasty to share with friends and family.
The Basics of Pickling
At its core, pickling is a way of preserving food by soaking it in a brine solution. The brine contains vinegar, water, salt, and often sugar for sweetness. This mixture stops bacteria from spoiling the food and encourages fermentation (if desired).
The process is simple, but there are two main methods:
- Quick Pickling: Perfect if you want pickles ready in a day or two. These are stored in the fridge.
- Fermented Pickling: This takes more time and relies on natural fermentation. The result is deeper flavors and probiotics that are good for your gut.
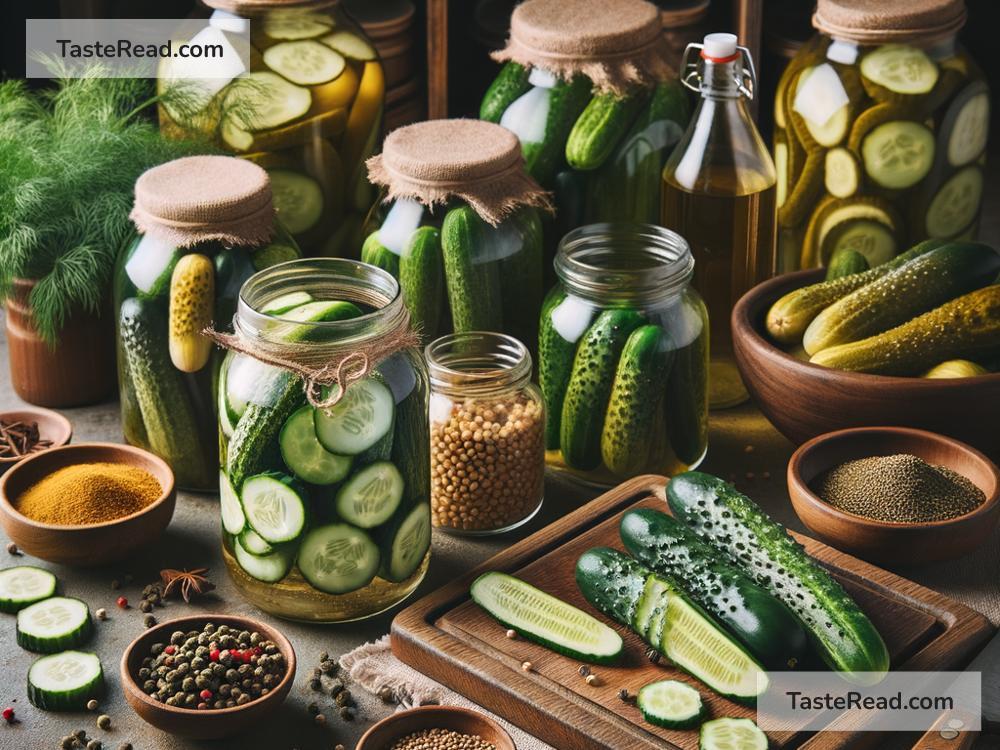
Ingredients You’ll Need
Before starting, gather your supplies:
- Fresh Produce: Cucumbers are the classic choice, but you can pickle carrots, radishes, onions, green beans, peppers, etc.
- Vinegar: Use white vinegar, apple cider vinegar, or rice vinegar depending on your taste preferences.
- Water: Filtered water is ideal to ensure clean flavors.
- Salt: Pickling or kosher salt works best (avoid salts with iodine).
- Sugar (optional): Adds sweetness to balance the acidity.
- Spices and Herbs: Dill, garlic, mustard seeds, peppercorns, red chili flakes, and bay leaves are popular!
- Glass Jars: Sterilized mason jars are perfect for storing pickles.
Step-by-Step Guide to Making Artisan Pickles
Follow these steps to get started:
1. Choose Your Vegetables
Decide what you want to pickle. Wash your vegetables thoroughly to remove dirt or wax. If using cucumbers, pick ones that are firm and small (Kirby cucumbers are ideal).
Cut the vegetables into slices, spears, or leave them whole. The size depends on your preferences and the jar you’re using.
2. Prepare the Brine
In a pot, combine your vinegar, water, and salt. If you want sweeter pickles, add a bit of sugar. Heat the mixture until the salt and sugar dissolve, then let it cool slightly.
For example, a typical brine recipe looks like this:
– 1 cup vinegar
– 1 cup water
– 1 tablespoon salt
– 1 tablespoon sugar (optional)
3. Pack Your Jars
Put your sliced or whole vegetables into sterilized jars. Add your chosen spices and herbs to the jar. For instance, if you want dill pickles, add fresh dill sprigs, garlic cloves, and mustard seeds.
4. Pour the Brine
Carefully pour the warm brine into the jars, covering the vegetables completely. Make sure there’s about ½ inch of space at the top of the jar. Seal the jars tightly with lids.
5. Refrigerate (for Quick Pickles)
If you’re making quick pickles, place the jars in the refrigerator once they cool to room temperature. The pickles will be ready to eat in 24-48 hours!
6. Ferment (for Traditional Pickles)
For fermented pickles, leave the jars at room temperature for 3-7 days. Cover them loosely with lids so gases can escape during fermentation. Taste them regularly to see when they’re just right. Once done, store them in the fridge.
Tips for Best Results
- Use Fresh Ingredients: Fresh cucumbers and high-quality spices make a huge difference in flavor.
- Experiment: Try different vinegars, spice blends, and vegetables to discover your favorite combinations.
- Keep It Clean: Sterilize your jars to prevent unwanted bacteria.
Storing Your Pickles
Homemade quick pickles will stay good in the fridge for up to 1-2 months. Fermented pickles can last longer—up to 6 months—if stored properly in the refrigerator.
Final Thoughts
Making artisan pickles at home is an enjoyable, creative process that lets you explore unique flavors. Whether you’re a fan of tangy dill pickles or bold, spicy ones, the possibilities are endless. So grab some cucumbers, vinegar, and spices, and get pickling!
Your homemade jars of crunchy goodness will not only be delicious but also a great way to impress friends and family. Once you start making artisan pickles, you might never want store-bought ones again!
Happy pickling!