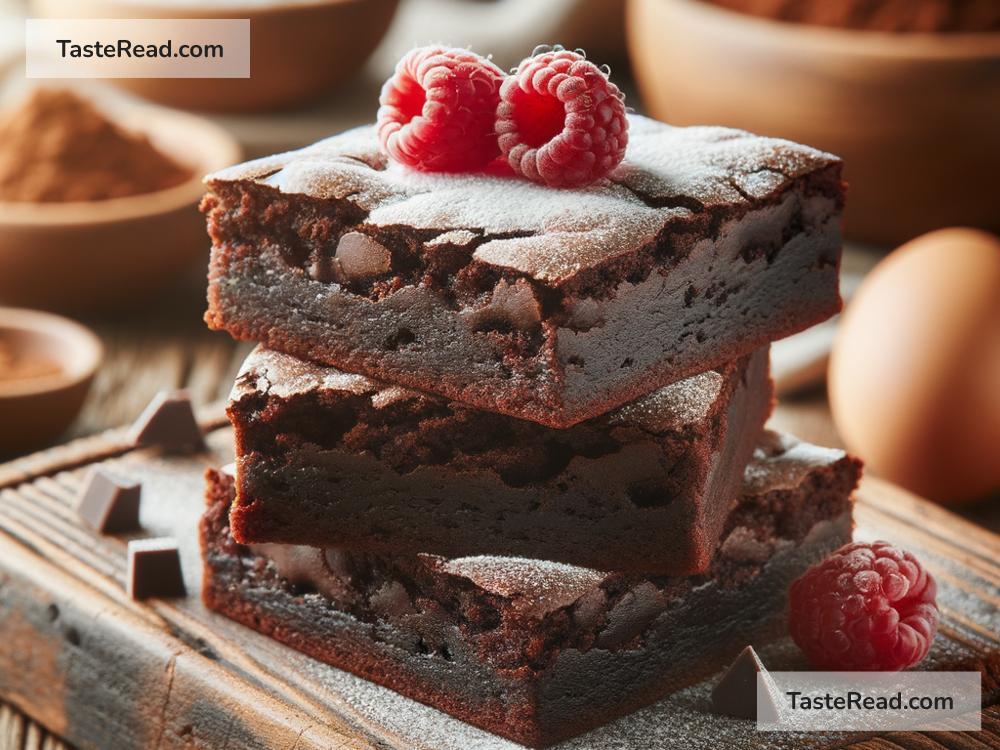
How to Make Homemade Chocolate Brownies
Nothing beats the warm, gooey deliciousness of homemade chocolate brownies. Whether you’re looking for a simple dessert to impress your friends or want to treat yourself after a long day, brownies are always a great choice. Luckily, making them from scratch is easy—no fancy equipment or advanced baking skills needed. In this blog post, I’ll guide you through the process of making chocolate brownies step by step, using simple, everyday ingredients. Let’s get started!
Why Make Brownies at Home?
Store-bought brownies are convenient, but homemade ones are far more satisfying. When you bake brownies yourself, you can control the ingredients, adjust the sweetness, and create the perfect chewy, fudgy texture. Plus, the wonderful smell of chocolate wafting through your kitchen is unbeatable!
Ingredients You’ll Need
To bake a batch of classic chocolate brownies, you’ll need:
- ½ cup (1 stick) of unsalted butter
- 1 cup of granulated sugar
- 2 large eggs
- 1 teaspoon vanilla extract
- ⅓ cup unsweetened cocoa powder
- ½ cup all-purpose flour
- ¼ teaspoon salt
- ¼ teaspoon baking powder
These ingredients are common and easy to find at your local grocery store. You likely already have most of them at home!
Tools You’ll Need
Before you begin, gather the basic tools you’ll need:
- A baking dish (usually an 8×8-inch square pan works best)
- Mixing bowls
- A whisk or wooden spoon
- Measuring cups and spoons
- Parchment paper or cooking spray
Now that you’re ready, let’s start baking!
Step-by-Step Instructions to Make Chocolate Brownies
Step 1: Preheat Your Oven
First, preheat your oven to 350°F (175°C). This ensures that your brownies will bake evenly and have a perfect texture.
If your baking dish isn’t non-stick, lightly grease it with cooking spray or butter. For an easier clean-up, line the pan with parchment paper.
Step 2: Melt the Butter
In a microwave-safe bowl or a small saucepan, melt ½ cup of unsalted butter. Once melted, let it cool slightly.
Tip: Don’t let the butter get too hot—it should be warm but not boiling, so you don’t accidentally cook the eggs later.
Step 3: Combine Butter and Sugar
Pour the melted butter into a mixing bowl. Add 1 cup of granulated sugar and whisk them together until smooth and creamy. This step is important for creating that signature fudgy texture in your brownies.
Step 4: Add the Eggs and Vanilla
Crack 2 large eggs into the bowl with the butter-sugar mixture. Add 1 teaspoon of vanilla extract for extra flavor. Whisk everything together until completely combined.
Make sure to mix thoroughly—this will help your brownies become rich and moist.
Step 5: Add the Dry Ingredients
In a separate bowl, mix the dry ingredients: ⅓ cup of unsweetened cocoa powder, ½ cup of all-purpose flour, ¼ teaspoon of baking powder, and ¼ teaspoon of salt.
Gradually add the dry mixture to the wet ingredients. Stir gently using a whisk or wooden spoon until everything is blended. Be careful not to overmix—the batter should be thick but smooth.
Step 6: Pour the Batter into the Baking Dish
Pour your brownie batter into the prepared baking dish. Use a spatula to spread it evenly. If you’re a fan of extra toppings, you can sprinkle chocolate chips, nuts, or candies over the batter at this stage.
Step 7: Bake
Place the pan in your preheated oven and bake for 20-25 minutes. Brownies are tricky—they should be cooked enough to hold together but still moist and gooey inside. To check if they’re done, insert a toothpick into the center. If it comes out with a few moist crumbs, your brownies are ready!
Avoid overbaking, as this can make them dry.
Step 8: Let Them Cool
Remove the pan from the oven and let the brownies cool for about 15-20 minutes. Cutting them while they’re hot might make them crumble, so it’s worth the wait!
Once cooled, use a knife to slice your brownies into squares or rectangles.
Serving Suggestions
You can enjoy your homemade brownies on their own or get creative with the toppings. Here are a few ideas:
– Serve warm brownies with a scoop of vanilla ice cream.
– Drizzle with chocolate or caramel sauce.
– Add whipped cream and fresh strawberries.
Storing Your Brownies
If you have leftovers (though that’s rare!), store them in an airtight container at room temperature for up to 3 days. For longer storage, wrap them tightly in plastic wrap and freeze for up to a month. Just pop them in the microwave for a few seconds to reheat.
Final Thoughts
Making homemade chocolate brownies is easy, fun, and so rewarding. You don’t need to be a professional baker to create a delicious treat that everyone will love. By following these simple steps, you’ll have a batch of brownies that are rich, chewy, and packed with chocolatey goodness.
Next time you’re craving dessert, skip the boxed mixes and try making brownies from scratch. Whether you’re baking for your family, friends, or just yourself, one thing is for sure—these brownies will disappear quickly!
Happy baking!