How to Make Homemade Pita Bread: A Simple Guide
Making pita bread at home is not as difficult as it may seem. With just a few basic ingredients and some simple steps, you can enjoy fresh, fluffy, and delicious pita bread right from your own kitchen. Pita bread is versatile and pairs beautifully with hummus, salads, wraps, or hearty stews. In this guide, you’ll learn how to make homemade pita bread that’s much better than store-bought ones. Let’s get started!
Ingredients You’ll Need
To make homemade pita bread, you only need five basic ingredients:
1. Flour – 3 cups of all-purpose or bread flour. Bread flour gives a chewier texture, but both work well.
2. Water – 1 cup of warm water (not too hot, or it can kill the yeast).
3. Yeast – 1 packet of instant or active dry yeast (about 2 ½ teaspoons).
4. Sugar – 1 teaspoon to help activate the yeast.
5. Salt – 1 teaspoon for flavor.
You might also want a tablespoon of olive oil for brushing the dough or your hands, but this is optional.
Step 1: Activate the Yeast
In a small bowl or measuring cup, combine the warm water, yeast, and sugar. Stir gently and let it sit for about 5–10 minutes. You’ll know the yeast is active when it starts to foam and bubble. This is a good sign that your dough will rise properly.
Step 2: Mix the Dough
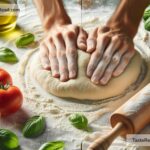
In a large bowl, mix the flour and salt. Make a small well in the center of the flour, and pour in the activated yeast mixture. Start mixing the flour and water together with a wooden spoon or your hands.
As the dough starts coming together, it might be sticky. Don’t worry! Continue kneading it on a floured surface for about 8–10 minutes until it forms a smooth and elastic ball. If the dough sticks too much, sprinkle a bit of flour over it as you knead but don’t add too much—you want the dough to stay soft.
Alternatively, you can use a stand mixer with a dough hook to knead the dough for 5–6 minutes.
Step 3: Let the Dough Rise
Place the dough in a lightly oiled bowl and cover it with a clean kitchen towel or plastic wrap. Let it sit in a warm place for about 1 to 2 hours, or until the dough doubles in size. If you’re cooking on a cold day, you can place the bowl near a warm oven or microwave to speed up the process.
Step 4: Divide and Shape the Dough
Once the dough has risen, punch it down gently to release any air bubbles. Transfer it to a clean surface and divide it into 8 equal pieces if you want smaller pitas or 6 pieces if you prefer larger ones.
Roll each piece into a small ball, then use a rolling pin to flatten them into circles about 1/4 inch thick. Don’t worry if the circles aren’t perfect—they’ll taste just as good!
Step 5: Cook the Pitas
Pita bread is traditionally cooked in a super-hot oven or a skillet. Here are two methods you can choose from:
Option 1: Oven Baking
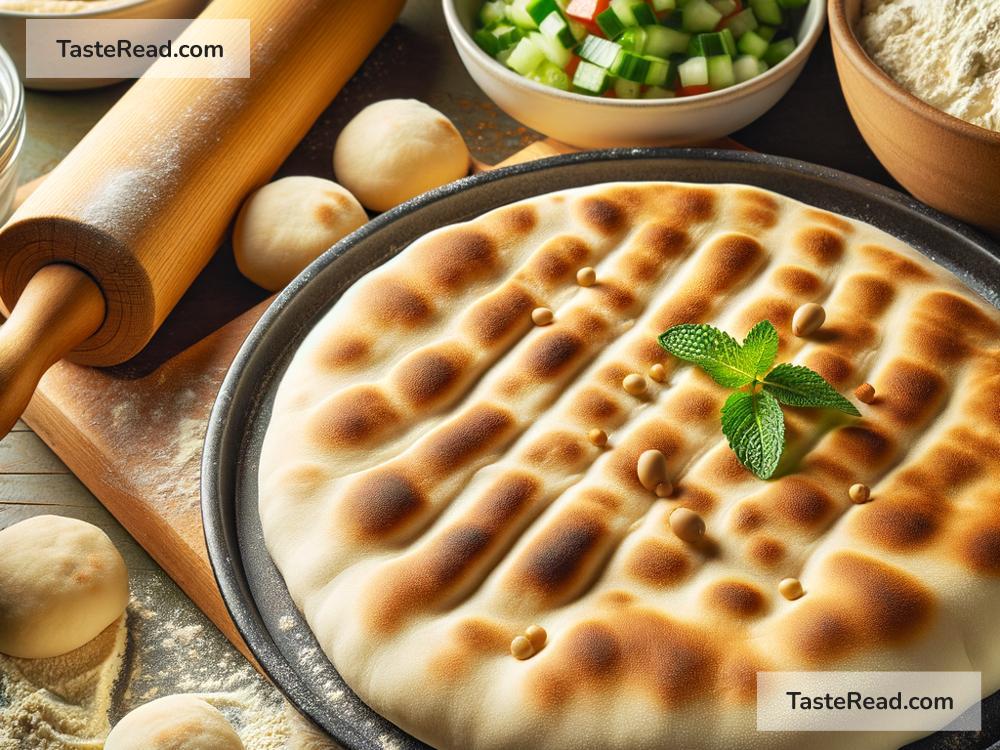
Preheat your oven to 450°F (230°C). Place a baking sheet or cast-iron pan inside the oven as it heats up. This ensures the surface is hot enough to mimic a traditional stone oven.
Place your rolled pita dough on the hot surface and bake for 3–5 minutes. If done correctly, you’ll see the pitas puff up beautifully, creating that signature pocket. Remove from the oven once lightly golden and puffed. Be careful—they cook quickly!
Option 2: Skillet Cooking
Heat a dry, non-stick skillet or cast-iron pan over medium-high heat. Place one flat pita dough onto the hot skillet and cook for about 1–2 minutes on one side. Flip and cook for another 1–2 minutes. You’ll see them puff up as they cook. Keep an eye on them to prevent burning.
Step 6: Cool and Serve
After cooking, transfer the pita bread to a clean towel to cool. Covering them with the towel helps keep them soft. Serve warm or store leftovers in an airtight bag or container.
Homemade pita bread is perfect for sandwiches, wraps, or dipping into your favorite sauces. You can also slice them into triangles and toast them to make crunchy pita chips.
Tips for Success
- Don’t skip the resting and rising step. This helps the dough become airy and soft.
- Roll evenly. To get perfect pockets in your pita, make sure the dough is rolled evenly.
- Work quickly. Once the dough is rolled and shaped, cook it promptly to get the best puff.
Why Make Your Own Pita Bread?
Homemade pita bread tastes fresher than store-bought versions, and you can customize it to your liking. Plus, it’s a fun project to do with family or friends—and nothing beats the satisfaction of baking your own bread.
Now that you know how simple and easy it is to make pita bread at home, give it a try! Soon, you’ll have delicious, warm pitas that’ll make you feel like a master baker. Enjoy!