How to Make Sourdough Starter: A Simple Guide for Beginners
Sourdough bread is famous for its tangy flavor, chewy crust, and soft crumb. But did you know it all starts with a sourdough starter? A sourdough starter is like a magic ingredient—it’s a mix of flour and water that collects wild yeast from the air and grows good bacteria that help your bread rise naturally. The best part? You can make it at home with just two simple ingredients: flour and water. Whether you’re a beginner or a baking enthusiast, this guide will walk you through the process of making a sourdough starter step by step.
What Is a Sourdough Starter?
Think of a sourdough starter as a living thing. It’s a mix of flour and water where wild yeast and bacteria grow over time. The yeast helps your bread rise, while the bacteria (called lactobacillus) adds flavor. Once your starter is strong and bubbly, you can use it to bake sourdough bread, pancakes, waffles, pizza dough, and more.
Ingredients You’ll Need
- Flour: You can use all-purpose flour, whole wheat flour, rye flour, or a combination of these. Whole wheat flour or rye flour works best for starting fermentation because it has more nutrients for yeast and bacteria to feed on.
- Water: Use water that’s room temperature and free of chlorine. If your tap water is chlorinated, use filtered or bottled water instead.
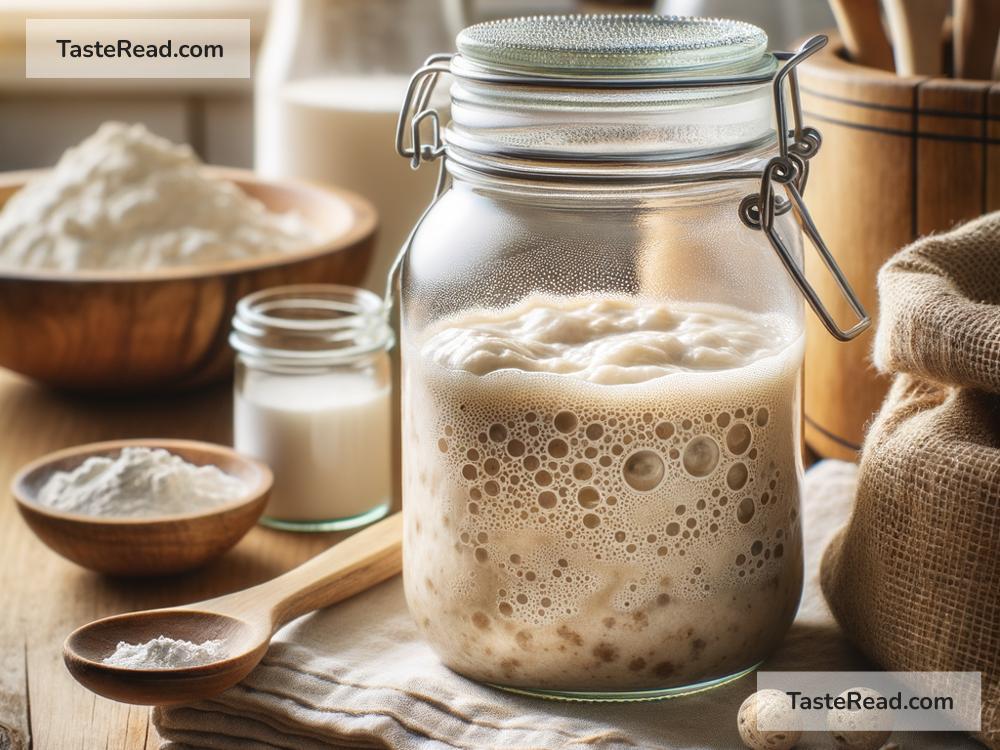
What You’ll Need
- A clean jar or container
- A spoon for stirring
- A kitchen scale (optional but helpful)
- A breathable cover (such as a loose lid, cloth, or plastic wrap)
Step-by-Step Guide to Making a Sourdough Starter
Day 1: Start the Starter
1. Mix 1/4 cup of flour and 1/4 cup of water in a clean jar or container. Stir until smooth; it should have the consistency of pancake batter.
2. Cover loosely with a lid or cloth. This keeps dust out but allows air to flow in. Leave the jar at room temperature, ideally between 70-75°F (21-24°C). Yeast thrives in this range!
3. Let it sit for 24 hours.
Day 2: Feed Your Starter
1. The next day, you might see a few bubbles or notice a slightly funky smell. This means the fermentation process is beginning!
2. Discard half of the starter (this prevents the mixture from growing too large and keeps yeast and bacteria balanced).
3. Add another 1/4 cup of flour and 1/4 cup of water to the jar. Stir well, cover loosely, and let it sit for another 24 hours.
Day 3-6: Keep Feeding
1. Each day, repeat the process: discard half of the starter, then feed it with equal amounts of flour and water (1/4 cup each).
2. As the days go on, you should notice more bubbles, a stronger smell (pleasantly sour), and the starter might double in size a few hours after feeding. This is a good sign that your wild yeast and bacteria are active.
3. If your room is colder than 70°F (21°C), the fermentation might take longer. Be patient and keep feeding daily.
Day 7: Test Your Starter
By Day 7, your starter should be bubbly, smell tangy, and rise consistently after feeding. To test if it’s ready for baking, drop a small spoonful of starter into a glass of water. If it floats, congratulations—your starter is strong and ready to use! If it sinks, keep feeding it for another day or two and try again.
How to Store Your Starter
Once your starter is fully developed, you don’t have to feed it every day. Here’s how to store it:
– Room Temperature: If you bake frequently, you can leave the starter at room temperature, feeding it daily.
– Refrigerator: For occasional baking, store the starter in the fridge. Feed it once a week to keep it healthy.
To revive a starter from the fridge, take it out and let it reach room temperature. Discard half, feed it with flour and water, and wait for it to bubble and rise before using it to bake.
Tips for Success
- Consistency is Key: Try to feed your starter at the same time every day. Wild yeast and bacteria thrive on routine!
- Be Patient: If fermentation takes longer than expected, don’t worry. Starters can be affected by temperature, flour type, and other factors.
- Don’t Overthink It: Sourdough starters are resilient. Even if you skip a feeding or make a mistake, you can usually revive it with regular care.
Final Thoughts
Making a sourdough starter is like nurturing a little science experiment in your kitchen. It’s simple, fun, and rewarding! Once you have an active starter, the possibilities are endless—crusty sourdough loaves, tangy pancakes, and homemade pizza await. Plus, there’s something special about baking with your own wild yeast that you cultivated from scratch.
So, grab some flour and water and get started today. In just a week, you’ll have your very own sourdough starter—a living, bubbling tool to help you create delicious homemade bread. Happy baking!