How to Create Buttery Honey Glazed Chicken Tenders: A Simple, Delicious Recipe
Chicken tenders are a favorite comfort food for many. They’re easy to prepare, versatile, and always satisfy your taste buds. But why settle for basic chicken tenders when you can elevate them with a luscious buttery honey glaze? This recipe is sweet, savory, and full of flavor, yet simple enough for even beginner cooks to master. You’ll have tender, juicy chicken coated in a sticky, shiny glaze that’ll have everyone asking for seconds.
In this blog, we’ll walk you through the step-by-step process of making buttery honey glazed chicken tenders that are perfect for dinner, parties, or just a special treat.
Ingredients You’ll Need:
To make these irresistible chicken tenders, gather the following:
For the tenders:
– 1 pound (about 500g) chicken tenders or boneless chicken strips
– 1 cup all-purpose flour
– 2 eggs
– 2 tablespoons milk
– 1 cup breadcrumbs (regular or panko for extra crunch)
– 1 teaspoon salt
– ½ teaspoon black pepper
– ½ teaspoon garlic powder (optional)
– Cooking oil for frying (vegetable or canola works well)
For the buttery honey glaze:
– ⅓ cup honey
– ¼ cup unsalted butter
– 1 tablespoon soy sauce (optional for adding extra depth of flavor)
– ½ teaspoon paprika (optional for a smoky touch)
– ½ teaspoon chili flakes or cayenne pepper (optional for a bit of spice)
Step 1: Prepare the Chicken Tenders
Start by prepping the chicken tenders. If you have whole chicken breasts, cut them into thin strips about the size of typical tenders. Make sure they’re roughly the same size for even cooking.
Step 2: Bread the Chicken
Breaded chicken has a delicious crunch that pairs perfectly with the sweet honey glaze. Here’s how to bread them:
-
Prepare three bowls for your breading assembly line. In the first bowl, add the all-purpose flour along with the salt, pepper, and garlic powder. Mix well.
-
In the second bowl, whisk together the eggs and milk until smooth.
-
In the third bowl, add the breadcrumbs. If desired, you can season the breadcrumbs with additional spices like paprika or dried parsley.
-
Take each chicken tender and coat it first in the flour mixture (tap off any excess flour), then dip it into the egg mixture, and finally press it into the breadcrumbs until fully covered. Repeat this process for all the chicken strips.
Step 3: Cook the Chicken
The breaded chicken tenders can be fried, baked, or air-fried based on your preference:
Option 1: Frying (for maximum crunch)
– Heat about ½ inch of cooking oil in a skillet over medium-high heat. Once the oil is hot (around 350°F or 175°C), add the tenders in batches, making sure not to crowd the pan.
– Cook for 3–4 minutes per side or until golden brown and cooked through.
– Remove and place on a plate lined with paper towels to absorb excess oil.
Option 2: Baking (for a lighter version)
– Preheat your oven to 400°F (200°C). Place the breaded chicken tenders on a baking sheet lined with parchment paper or lightly greased foil.
– Bake for 15–20 minutes, flipping halfway through, until golden and cooked through.
Option 3: Air-Frying (quick and healthy)
– Preheat the air fryer to 375°F (190°C). Lightly spray the air fryer basket with cooking spray, then arrange the tenders in a single layer.
– Cook for about 10–12 minutes, flipping halfway through, until crispy and fully cooked.
Whichever method you choose, make sure the internal temperature of the chicken reaches 165°F (74°C) for safe consumption.
Step 4: Make the Buttery Honey Glaze
While the chicken is cooking, whip up the star of the show—the buttery honey glaze.
- In a small saucepan, melt the unsalted butter over medium heat.
- Add the honey to the melted butter and stir well.
- If you’d like to add a little extra flavor, stir in the soy sauce, paprika, and chili flakes. These optional ingredients can make the glaze even more delicious!
- Let the mixture simmer for about 1–2 minutes, stirring occasionally until it slightly thickens into a syrupy consistency.
Step 5: Toss the Chicken in the Glaze
Once the chicken tenders are cooked and crispy, toss them gently in the warm buttery honey glaze to fully coat each piece. You can do this in a large mixing bowl or brush the glaze onto the chicken.
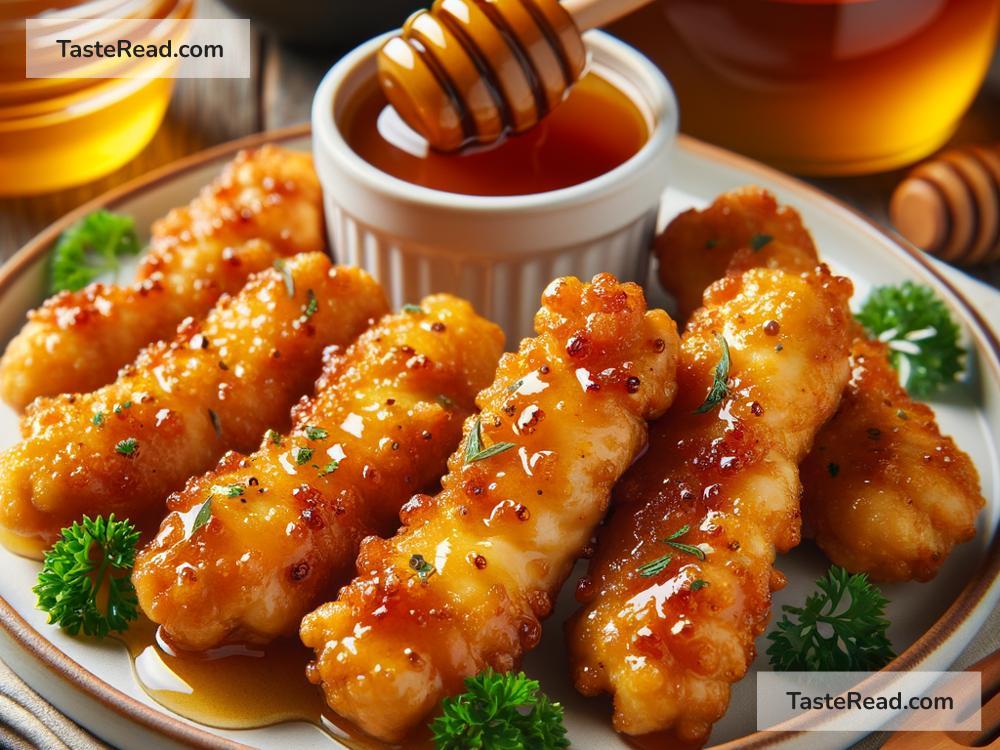
Step 6: Serve and Enjoy!
Your buttery honey glazed chicken tenders are now ready to serve! Garnish with chopped fresh parsley, sesame seeds, or even a squeeze of fresh lemon juice to brighten up the dish. Pair them with rice, mashed potatoes, a fresh salad, or simply enjoy them on their own.
Tips for Perfect Chicken Tenders:
- Double bread for extra crunch: For super crispy tenders, do a double layer of breading (dip them in egg and breadcrumbs twice).
- Don’t overcrowd the pan: Whether frying or baking, give the chicken space to cook evenly and become crisp.
- Adjust glaze sweetness: You can tweak the honey and butter ratio depending on how sweet or buttery you’d like the glaze to be.
Conclusion:
Making buttery honey glazed chicken tenders doesn’t have to be complicated. With just a few simple ingredients and steps, you’ll have a dish that’s bursting with flavor and perfect for any occasion. This recipe combines the crunch of crispy chicken with the sweetness of honey and the richness of butter, creating a homemade masterpiece that beats store-bought options any day.
So grab your apron, head to the kitchen, and give this recipe a try. Trust us—your family and friends will be impressed, and you’ll discover a new favorite way to enjoy chicken tenders!