How to Create Classic Chocolate Chip Cookies: A Sweet and Simple Recipe
Who doesn’t love a warm, gooey, chocolate chip cookie fresh out of the oven? Classic chocolate chip cookies are a timeless treat and a favorite dessert for people of all ages. Whether you’re baking for a party, making snacks for your kids, or simply satisfying your own sweet tooth, homemade cookies always hit the spot. The best part? You don’t need fancy tools or special skills to bake them! Here’s a simple guide to making perfect chocolate chip cookies.
Why Bake Chocolate Chip Cookies?
Homemade chocolate chip cookies are far better than store-bought ones. You can control the flavor, texture, and sweetness, and they’re made with love—something you can’t buy in a package. Plus, baking cookies is a fun and relaxing activity that brings joy to your kitchen. It’s also a great way to bond with family or friends.
So grab your apron, roll up your sleeves, and let’s get started!
Ingredients You’ll Need
First, gather everything you need. This classic recipe uses basic ingredients you probably already have in your pantry and fridge:
Dry Ingredients:
- 2 1/4 cups (285g) all-purpose flour
- 1 teaspoon baking soda
- 1/2 teaspoon salt
Wet Ingredients:
- 1 cup (227g) unsalted butter, softened
- 3/4 cup (150g) granulated sugar
- 3/4 cup (150g) brown sugar (light brown or dark brown works)
- 2 large eggs
- 2 teaspoons vanilla extract
Mix-Ins:
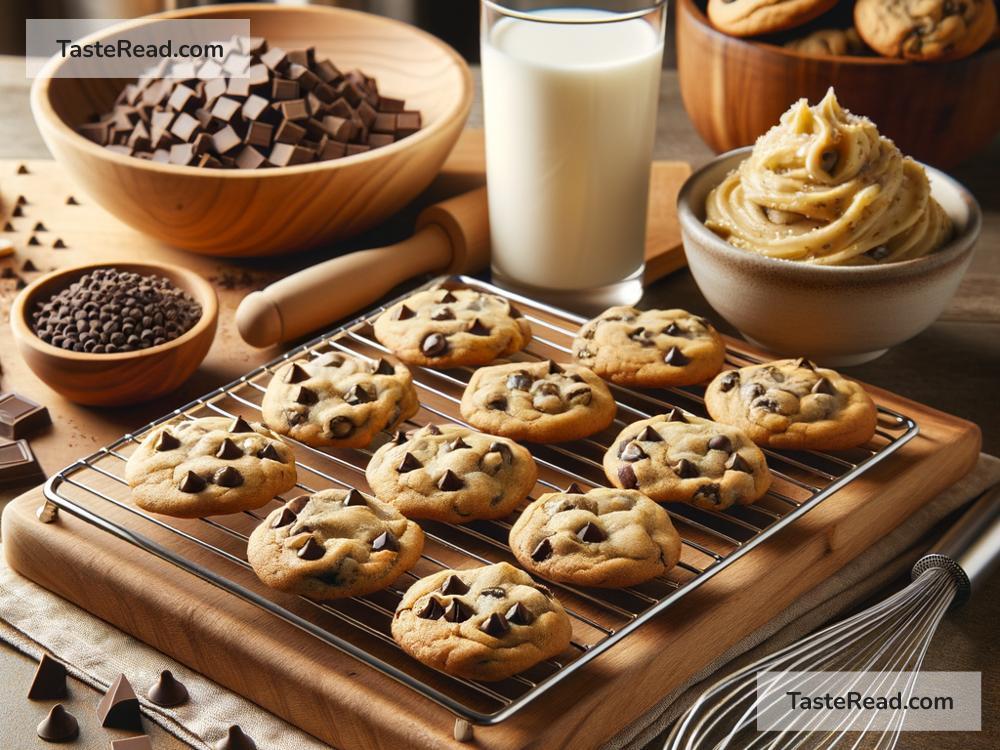
- 2 cups (340g) semisweet chocolate chips
- Optional: 1 cup chopped nuts (like walnuts or pecans), if you like extra crunch
Step-by-Step Instructions
Here’s how you can whip up a fresh batch of chocolate chip cookies in no time:
Step 1: Preheat Your Oven
Preheat your oven to 375°F (190°C). This allows it to get to the right temperature while you prepare the dough. Also, line two baking sheets with parchment paper or lightly grease them to prevent sticking.
Step 2: Mix the Dry Ingredients
In a medium-sized bowl, whisk together the flour, baking soda, and salt. This step ensures the dry ingredients are evenly distributed. Set the bowl aside for now.
Step 3: Cream Butter and Sugars
In a large mixing bowl, add the softened butter, granulated sugar, and brown sugar. Using a hand mixer or stand mixer, beat these ingredients together for 2–3 minutes until the mixture is light and fluffy. If you don’t have a mixer, you can use a sturdy wooden spoon or whisk—it just takes a little more effort!
Step 4: Add Eggs and Vanilla
Crack in the eggs one at a time, mixing well after each addition. Stir in the vanilla extract. The eggs and vanilla give your cookies a rich, smooth flavor that complements the sweetness of the chocolate chips.
Step 5: Combine Wet and Dry Ingredients
Gradually add the flour mixture to the wet ingredients a little at a time. Mix slowly to avoid spills until you have a thick, smooth dough. Be careful not to overmix it, as this can make the cookies tough instead of soft.
Step 6: Fold in the Chocolate Chips
Now it’s time for the best part! Gently stir in the chocolate chips (and nuts, if using) using a spatula or wooden spoon. Make sure they’re evenly distributed throughout the dough.
Step 7: Scoop and Shape
Use a tablespoon or cookie scoop to portion out your dough. Roll each portion into a ball and place them on the prepared baking sheets, leaving about 2 inches of space between each cookie. This gives them enough room to spread out as they bake.
Step 8: Bake to Perfection
Place your baking sheets in the preheated oven and bake for 8–10 minutes, or until the cookies are golden brown around the edges but still soft in the center. Keep an eye on them—everyone’s oven is a little different! If you prefer crispy cookies, leave them in the oven for an extra minute or two.
Step 9: Cool and Enjoy
Remove the cookies from the oven and let them cool on the baking sheets for a couple of minutes. Then, transfer them to a wire rack to cool completely. Once they’re cool, dig in and enjoy your delicious homemade treats with a cold glass of milk or your favorite beverage!
Tips for Success
- Use room-temperature butter: This is key to getting that creamy dough. Hard butter won’t mix properly, and melted butter can make the cookies greasy.
- Don’t skimp on the chocolate chips: The more chocolatey, the better. You can even mix in chunks or mini chips for variety.
- Experiment with flavors: Want something extra? Try adding a pinch of cinnamon to the dough or swapping out semisweet chocolate for dark chocolate.
Storing Your Cookies
If you have leftovers (though it’s hard to believe you will!), store them in an airtight container for up to a week. To keep them soft, you can add a piece of bread to the container—it works like magic! You can also freeze the dough or baked cookies for up to 3 months.
And that’s it! Classic chocolate chip cookies are easy to make and guaranteed to please. Once you master this simple recipe, you’ll be able to bake cookies whenever the craving strikes. So go ahead, give it a try—you’re only a few steps away from homemade happiness. Happy baking!