How to Make Paleo-Friendly Nut Butter for Snacking
In recent years, the Paleo diet has surged in popularity, offering a way to eat more in tune with our ancient ancestors. The beauty of this eating plan lies in its simplicity: focusing on whole foods, like meats, fruits, vegetables, and nuts while avoiding processed foods, grains, and dairy. For those on this journey, finding snacks that fit into the Paleo framework can be a challenge, especially when craving something creamy and spreadable like peanut butter. But don’t worry, there’s a solution—making your own Paleo-friendly nut butter!
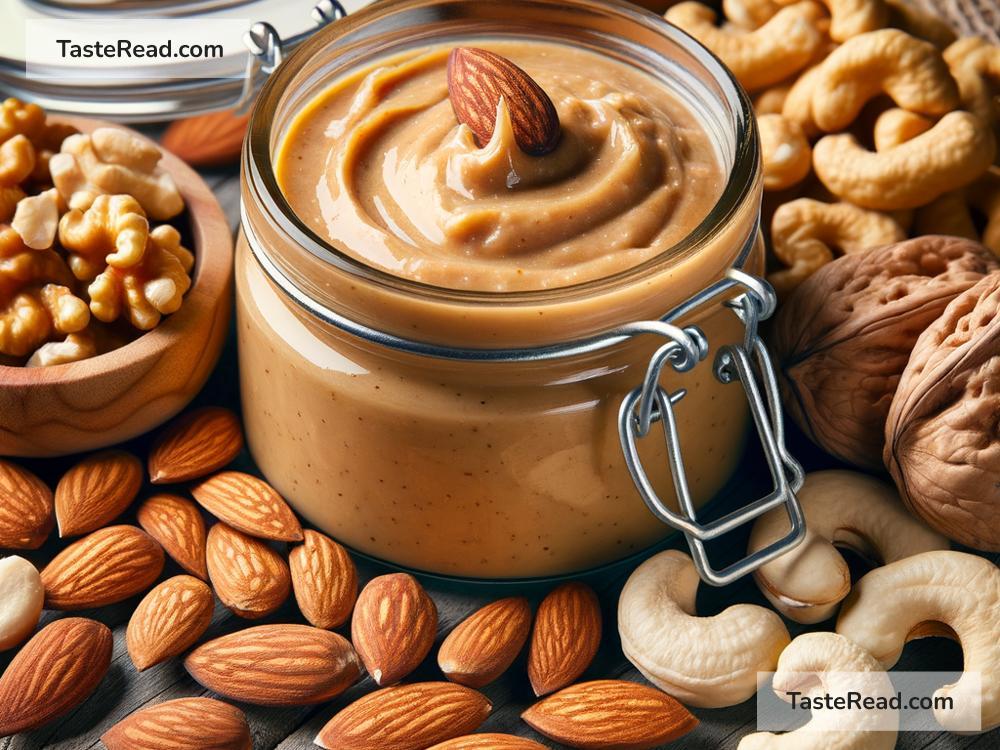
The Basics of Nut Butter
At its core, nut butter is simply nuts that have been ground into a paste. Store-bought versions often include added oils, sugars, and preservatives, which are not Paleo-compliant. The joy of making nut butter at home is that you get to control the ingredients, ensuring they are 100% Paleo-friendly and to your taste.
Choosing Your Nuts
The first step is deciding which nuts to use. Almonds, cashews, and hazelnuts are great options, offering rich flavors and health benefits. You can also mix different kinds of nuts to create a unique taste. Just remember, peanuts are legumes, not nuts, and thus, not Paleo-friendly.
Ingredients and Equipment
Here’s what you’ll need:
- 2 cups of your preferred unsalted nuts
- A pinch of sea salt
- Optional: a small amount of Paleo-friendly oil (like coconut or avocado), if needed
For equipment:
– A food processor or a high-powered blender
– A spatula
– A jar for storage
Step by Step: Making Your Nut Butter
1. Roast Your Nuts (Optional)
Roasting nuts can enhance their flavor. To do this, spread them on a baking sheet and roast in a preheated oven at 350°F (175°C) for about 10-12 minutes. Keep an eye on them to ensure they don’t burn. This step is optional; you can also use raw nuts for a milder flavor.
2. Blend
Once your nuts are cooled (if they were roasted), place them in your food processor or blender. Start pulsing to break them down. This process can take some time, so patience is key here. You’ll see the nuts go from a crumbly texture to a ball and finally to a creamy spread. If your mixture is too thick or struggling to become creamy, consider adding a small amount of oil to facilitate the process.
3. Season
Once the nuts have turned into a smooth butter, add a pinch of sea salt. Taste and adjust accordingly. If you prefer a sweeter nut butter, consider adding a Paleo-friendly sweetener like a drizzle of honey or maple syrup, although this is entirely optional.
4. Store
Transfer your freshly made nut butter into a jar or an airtight container. Homemade nut butter doesn’t contain preservatives, so it’s best to store it in the refrigerator. It should last for several weeks, but given how delicious it is, it’s unlikely it’ll stay uneaten for that long!
Enjoying Your Paleo-Friendly Nut Butter
Now that you have your homemade Paleo-friendly nut butter, the possibilities are endless! Spread it on apple slices, banana pieces, or use it in various Paleo recipes as a thickener or flavor enhancer. It’s not only a satisfying snack but also packed with healthy fats, proteins, and vitamins.
Conclusion
Making your own Paleo-friendly nut butter is a simple and rewarding process. It not only aligns with the dietary guidelines of the Paleo lifestyle but also provides a healthier, customizable alternative to store-bought versions. With just a few ingredients and a bit of patience, you can have a delicious and nutritious snack that’s perfect for any time of the day. So, grab your favorite nuts and get blending!